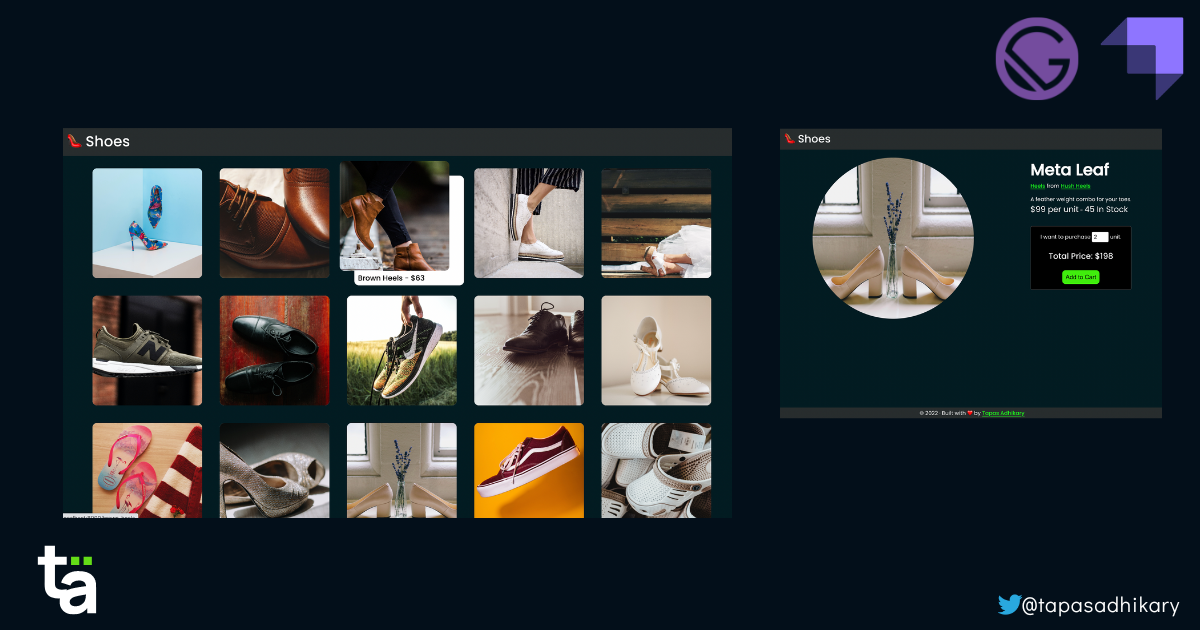
Build your ecommerce store using Gatsby and Strapi
Learn how to create a Jamstack ecommerce store using Gatsby and Strapi. We will build an online shoe store with a step-by-step approach.
Originally Published on Bugfender
Let’s start with a question: When building a website or app in this day and age, what are the primary things we need to consider?
Well there are loads of potential answers to this question, but speed, cost, and security should feature prominently no matter what we’re building. Whether it’s a blogging site, personal website, or e-commerce portal, our users will expect it to be fast to load, inexpensive to maintain and secure for the end-users.
Thankfully, the Jamstack architecture can help us on all three counts.
Jamstack allows us to build static websites using prebuilt markups, serverless APIs… even data from the CMS. These static sites are faster than the alternative, as the markups are prebuilt and served securely from a secured CDN (instead of an origin server).
And there’s an entire technology ecosystem that supports the creation of Jamstack applications. In this article, we’ll tackle two of the best-known of these technologies:Gatsby and Strapi.We’ll use them to build an eCommerce application — an online shoe store called, well, shoes. Original, right?
TL;DR
This may be quite a long article but it will give you the steps to build something really exciting.
If you want to look at the complete source code in advance, here is the GitHub repository to follow along:
Gatsby and Strapi
Gatsby is a React-based static site generator specifically designed to create prebuilt markups, and offers a unified cloud platform for building, previewing, and hosting your applications. It is super-quick, easy to integrate with various data sources, and it comes with a plethora of plug-in ecosystems.
Strapi, on the other hand, is an open-source, highly customizable application that helps you to build APIs faster and manage your content easily. Any front-end client can consume the APIs using REST or GraphQL, and you can self-host a Strapi application easily on a provider like Heroku.
The two programmes dovetail perfectly: while Gatsby provides a faster front-end, Strapi solves the need for a back-end datastore and content management system (CMS).
Ok, now you know what Gatsby and Strapi can offer, let’s see how they work in practice by building the shoes app.
Getting Started With The shoes App
We will divide the shoes app into two primary parts:
datastore: This requires theStrapiproject, with all the content and APIs needed for the application.client: This relies on theGatsbyproject, which uses APIs, with the help of GraphQL, to fetch the content from Strapi and render it in beautiful user interfaces.
First, we’ll set up the datastore using Strapi. Please note that you must have Node.js installed to run the application locally. You also have the option of installing yarn, but if you don’t have yarn, please use the npm instead.
The datastore using Strapi
Strapi provides a bunch of templates to get started with the application quickly. As our shoe store is an e-commerce app, we will use the ecommerce template to create the datastore.
To do this, simply create a shoes folder and open a command prompt (or terminal) on the shoes directory.
Now, use the following command to create a Strapi project:
yarn create strapi-app datastore --template ecommerce
Please note that we have supplied a project name as datastore and the template as ecommerce in the above command.
The command will take a while to download the required dependencies, install them, and set them up for you. However, once that’s done, the Strapi app will be accessible on your browser using the URL [localhost:1337](http://localhost:1337).
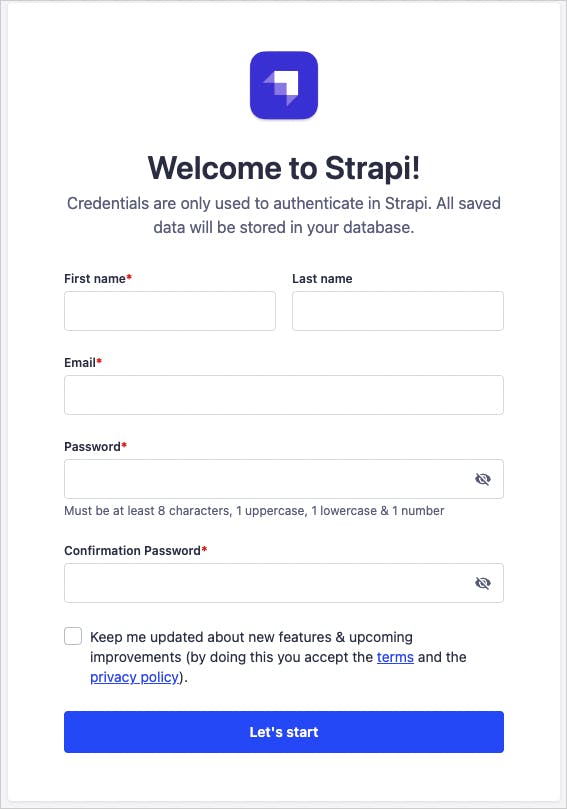
It’s also important to remember that you need to register your profile for the first time to create your credentials. These same credentials will be used to authenticate in Strapi, so please take the time to fill out the mandatory details and register.
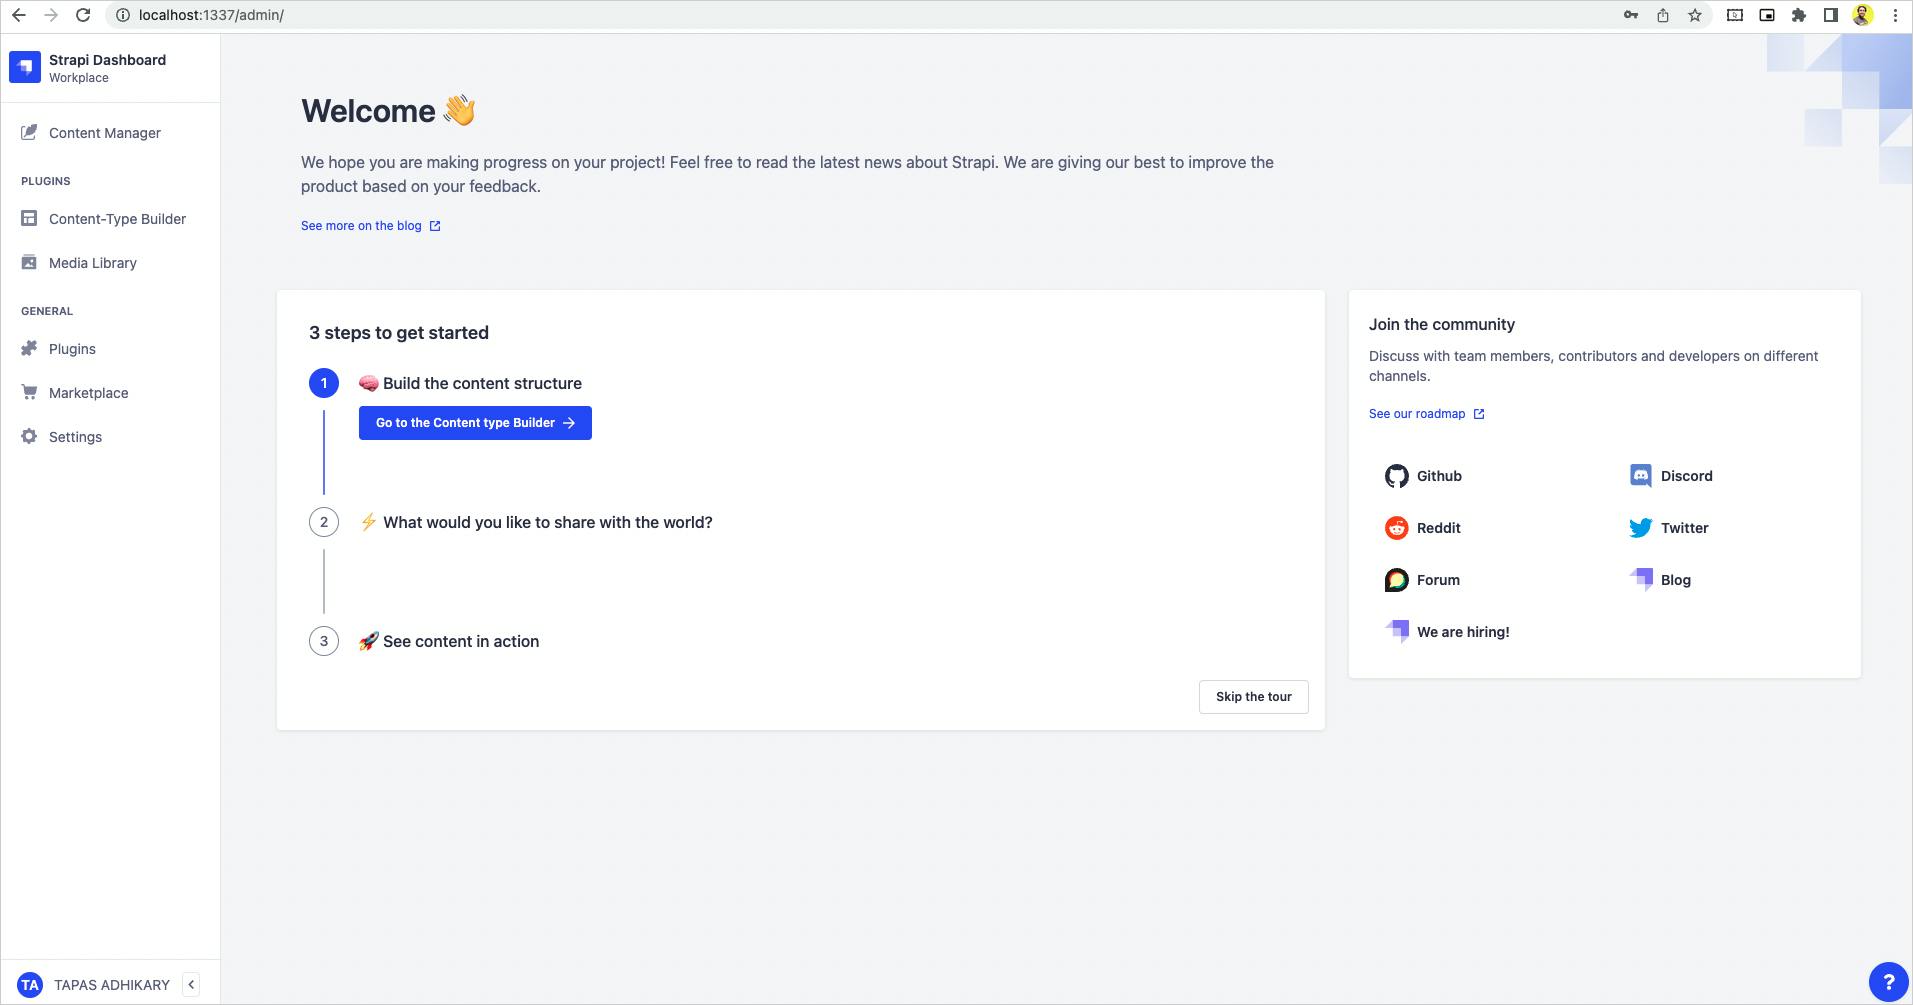
After registering, you will land on Strapi’s welcome page. This will give you the guiding pointers you need to create the content structure, join communities, and complete many more functions.
Create Types
Now we will start creating the types in Strapi. You can think of these types as tables with schema in the relational database.
For our application, we want to create shoe data as a Product type. Each shoe product will have its own meta information, like name, price, description, stock, category and company.
We will also manage Category and Company as independent types, and create relationships with the Product type.
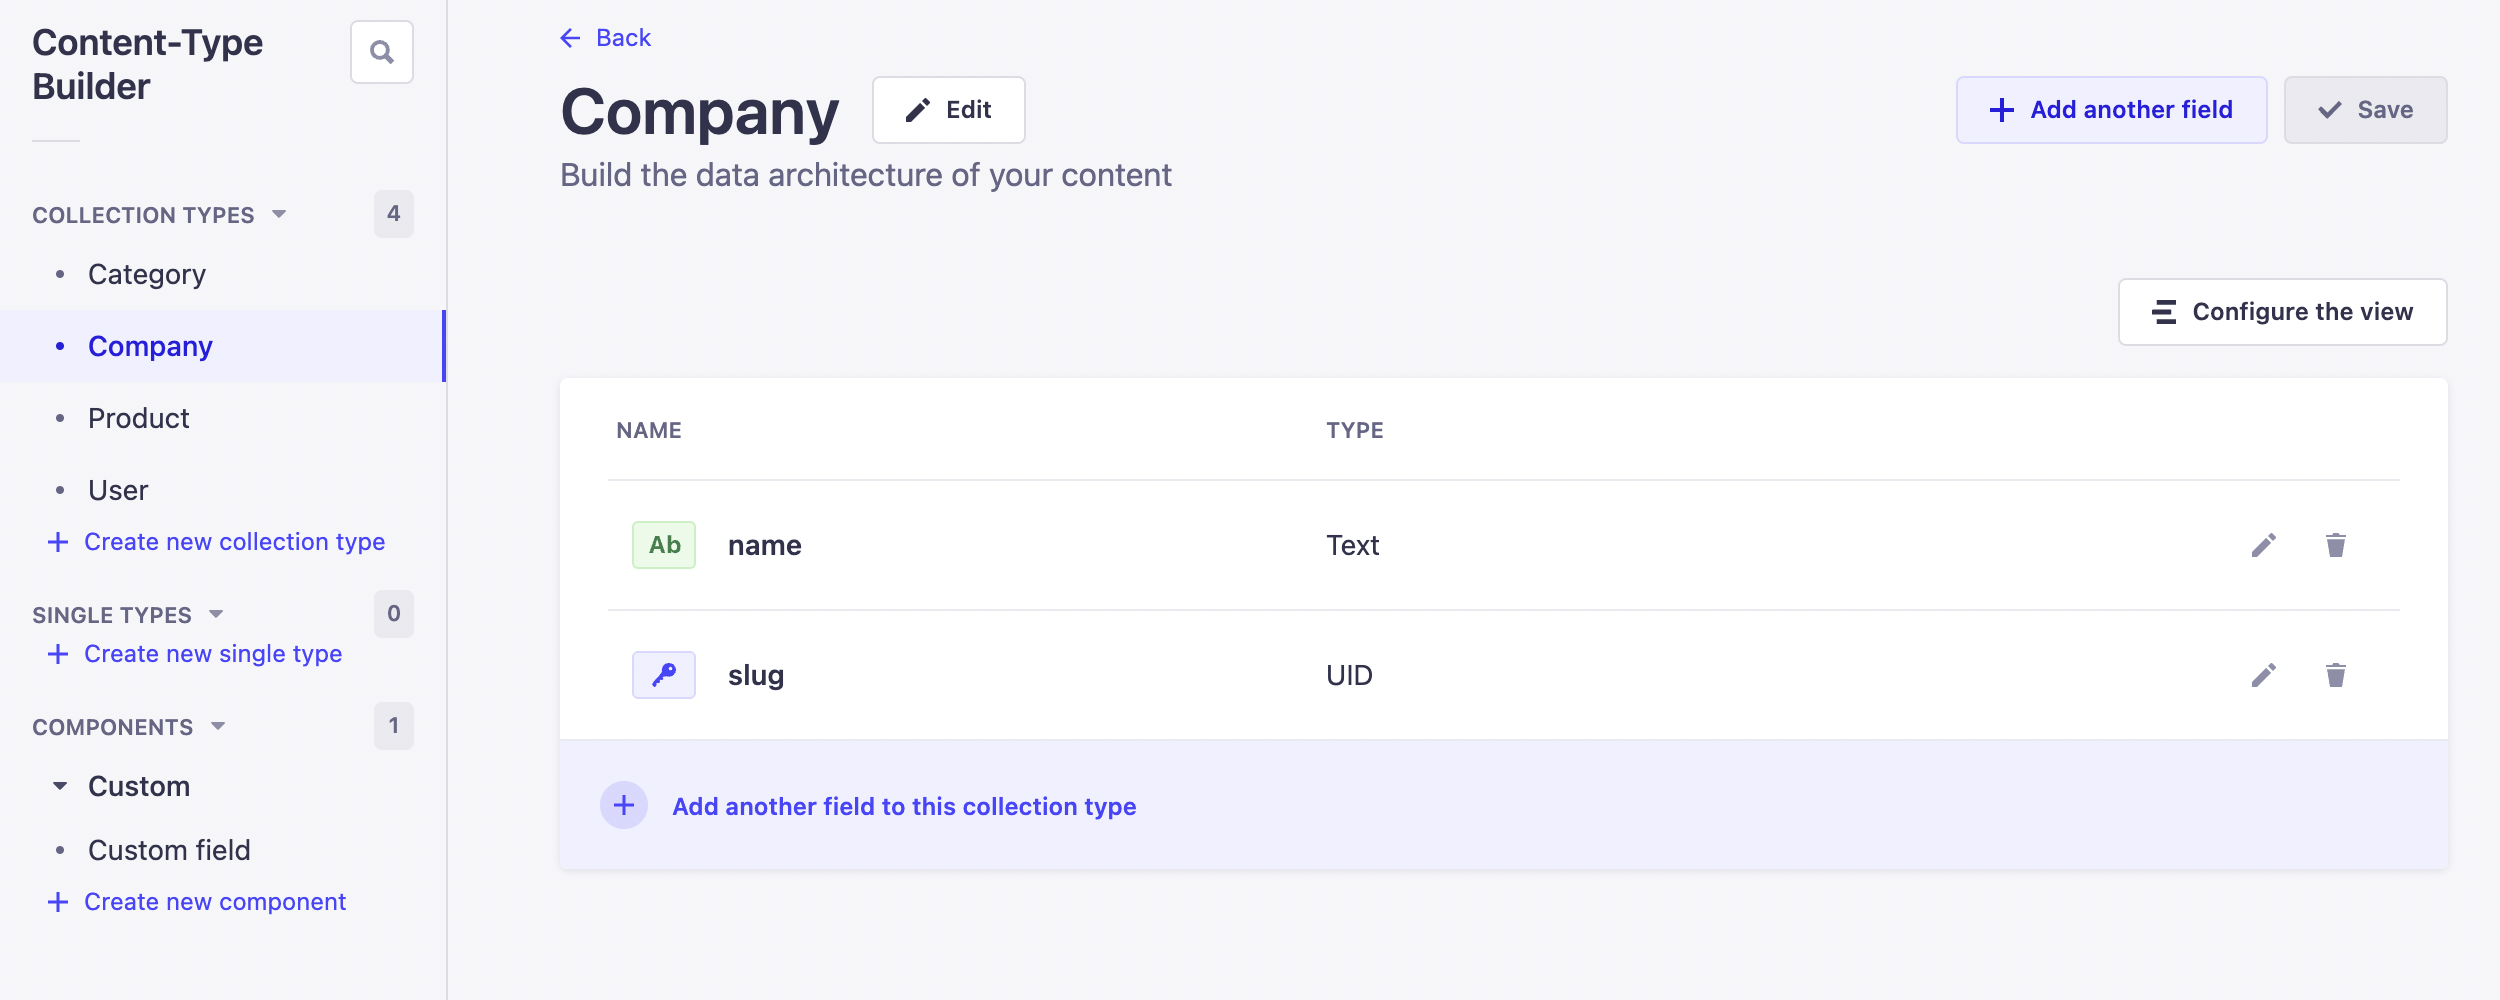
So, let’s start creating the types one by one. First, create the following fields for the Category type:
- name: A text type field.
- slug: a URL fragment to identify this category. It’s of type UID
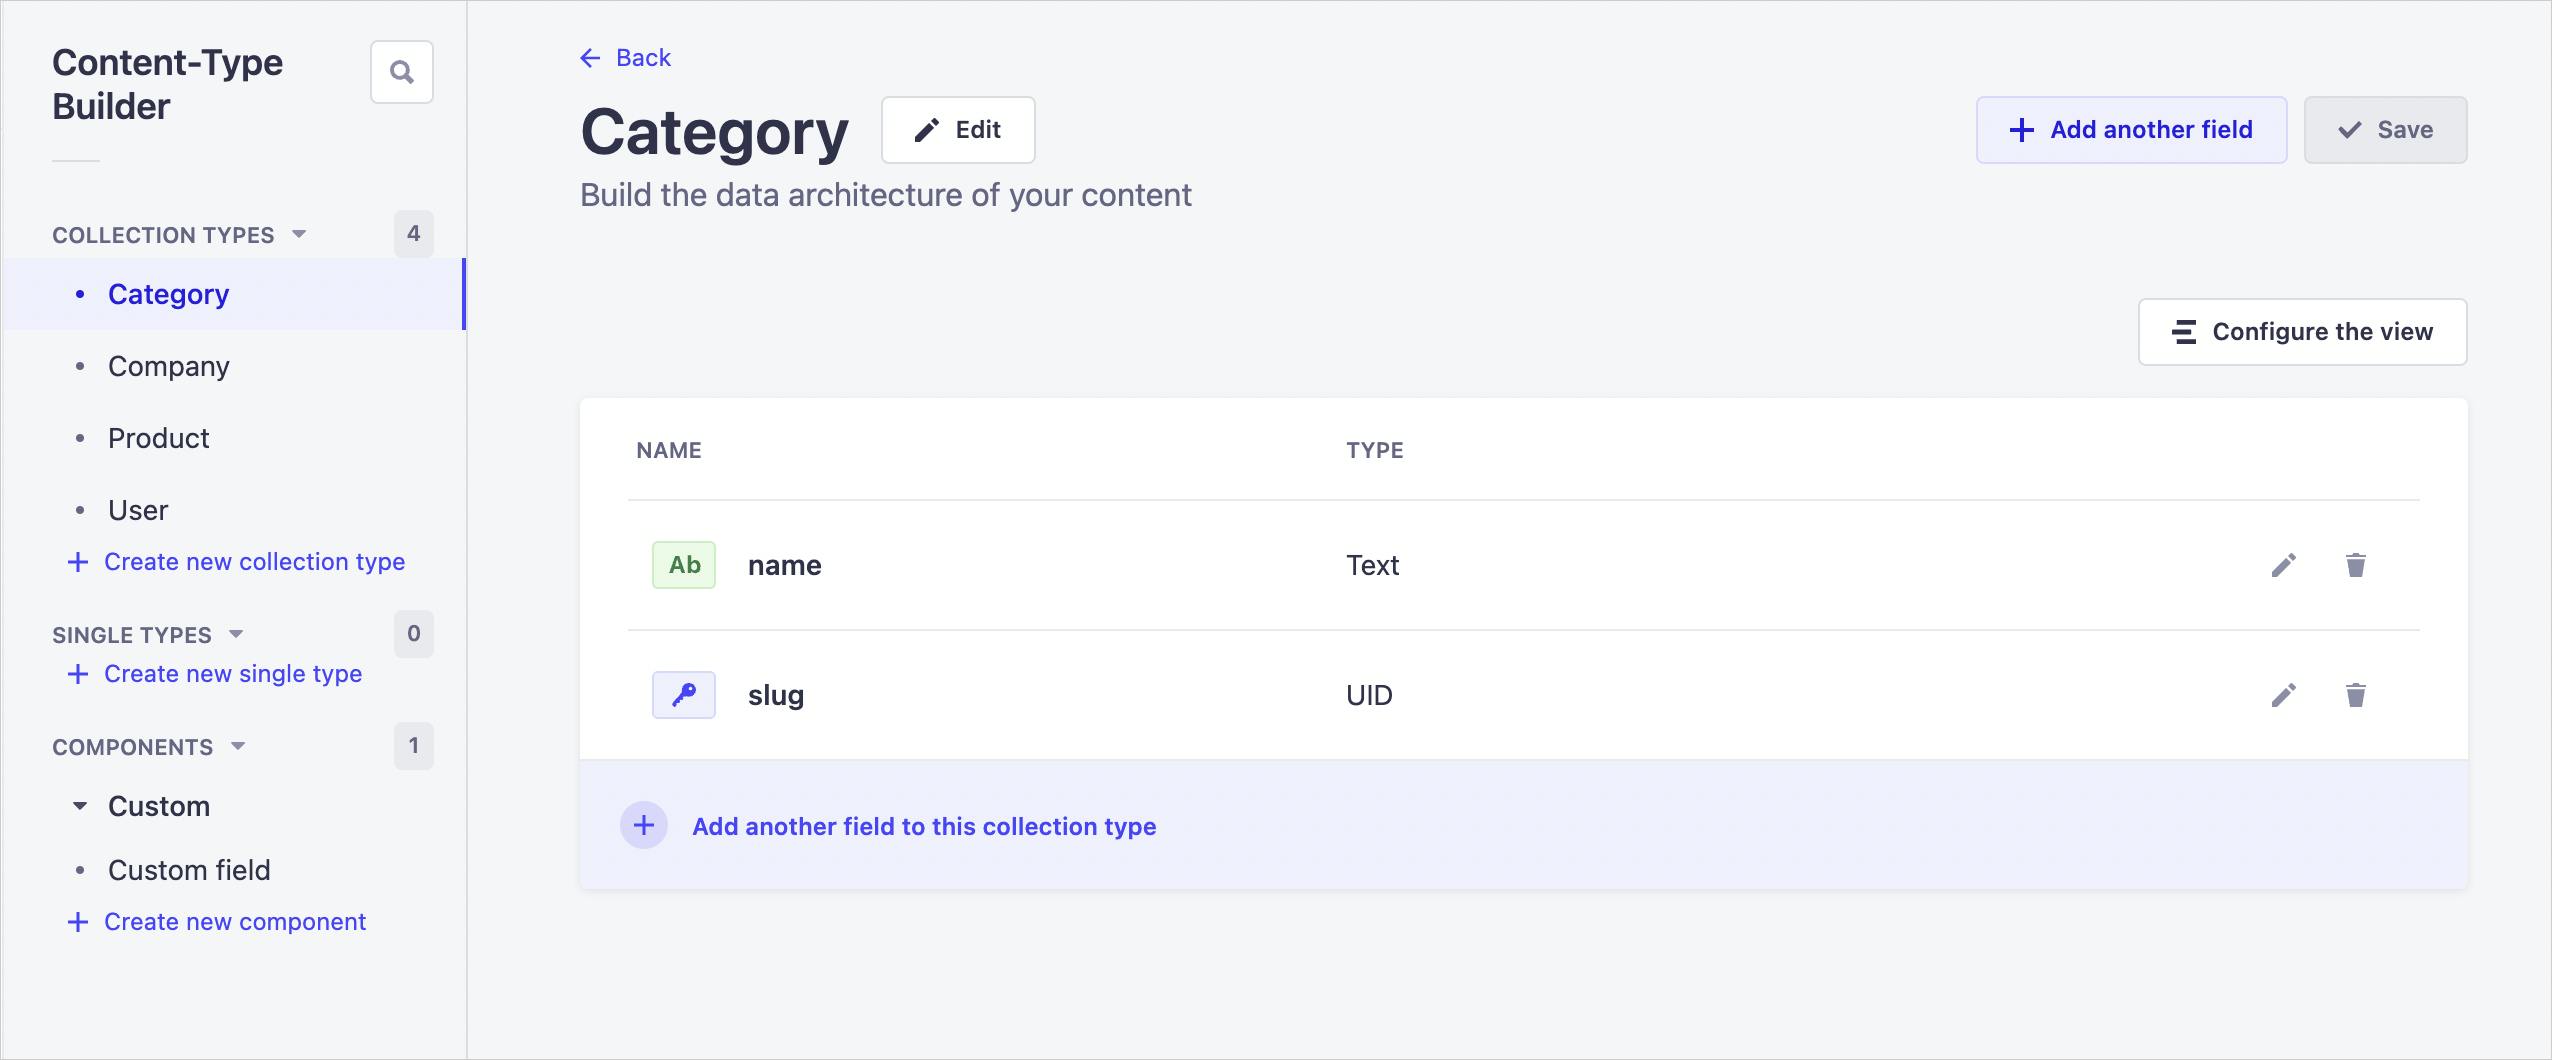
Similarly, you can create a Company type with the name and slug fields.
And now we will create the Product type, with the fields shown in the image below.
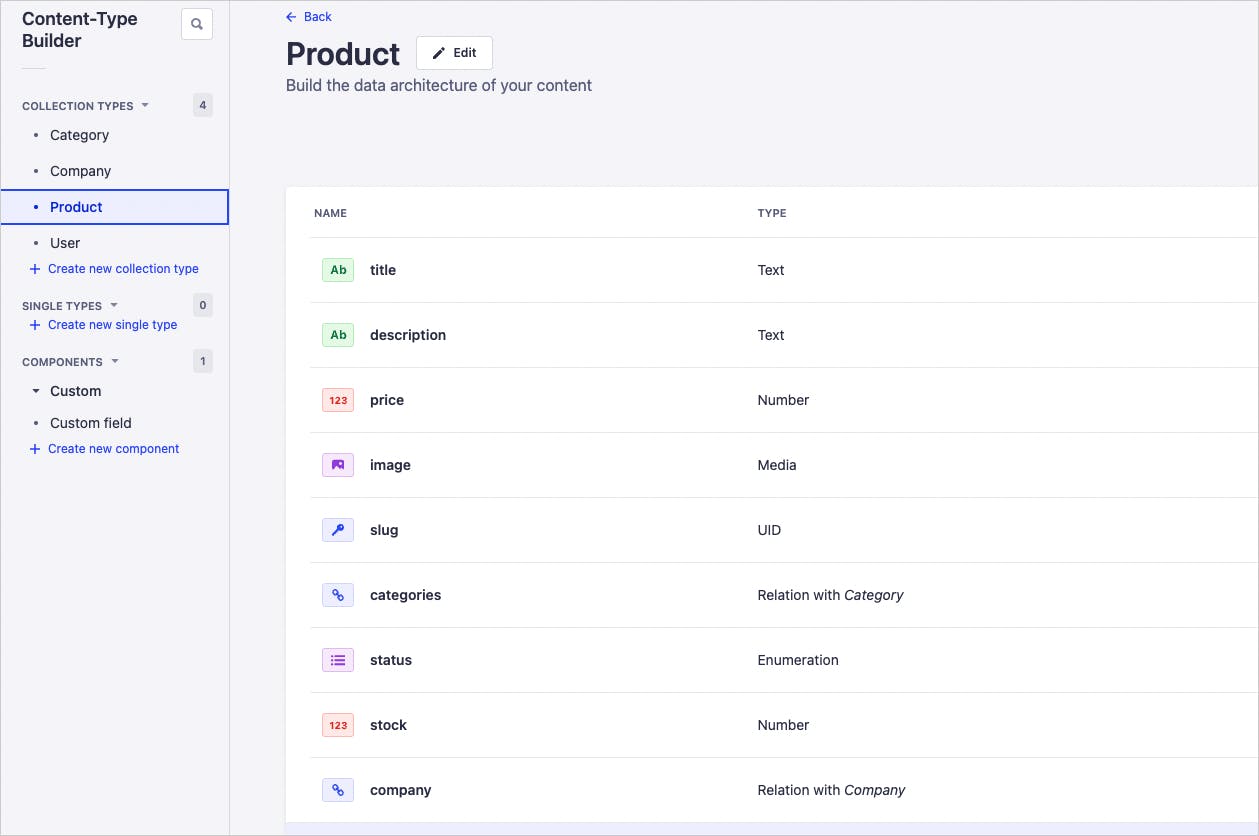
Most of the fields above are self-explanatory. However, a few fields need explanation.
- image: This refers to the image of the product, and the type is
Media. In Strapi, you can upload assets (images, videos, files) into the media library to use later. - categories and company relate to the respective types we have created already.
- status: A field indicates the status of the product.
- stock: A numeric field holds the record of the number of shoes in the stock.
Insert Data
As all the required types are now created, we can start creating sample data in Strapi. First, let’s upload some cool shoe images. You can collect them from a media website like unsplash and upload items from the Media Library menu.
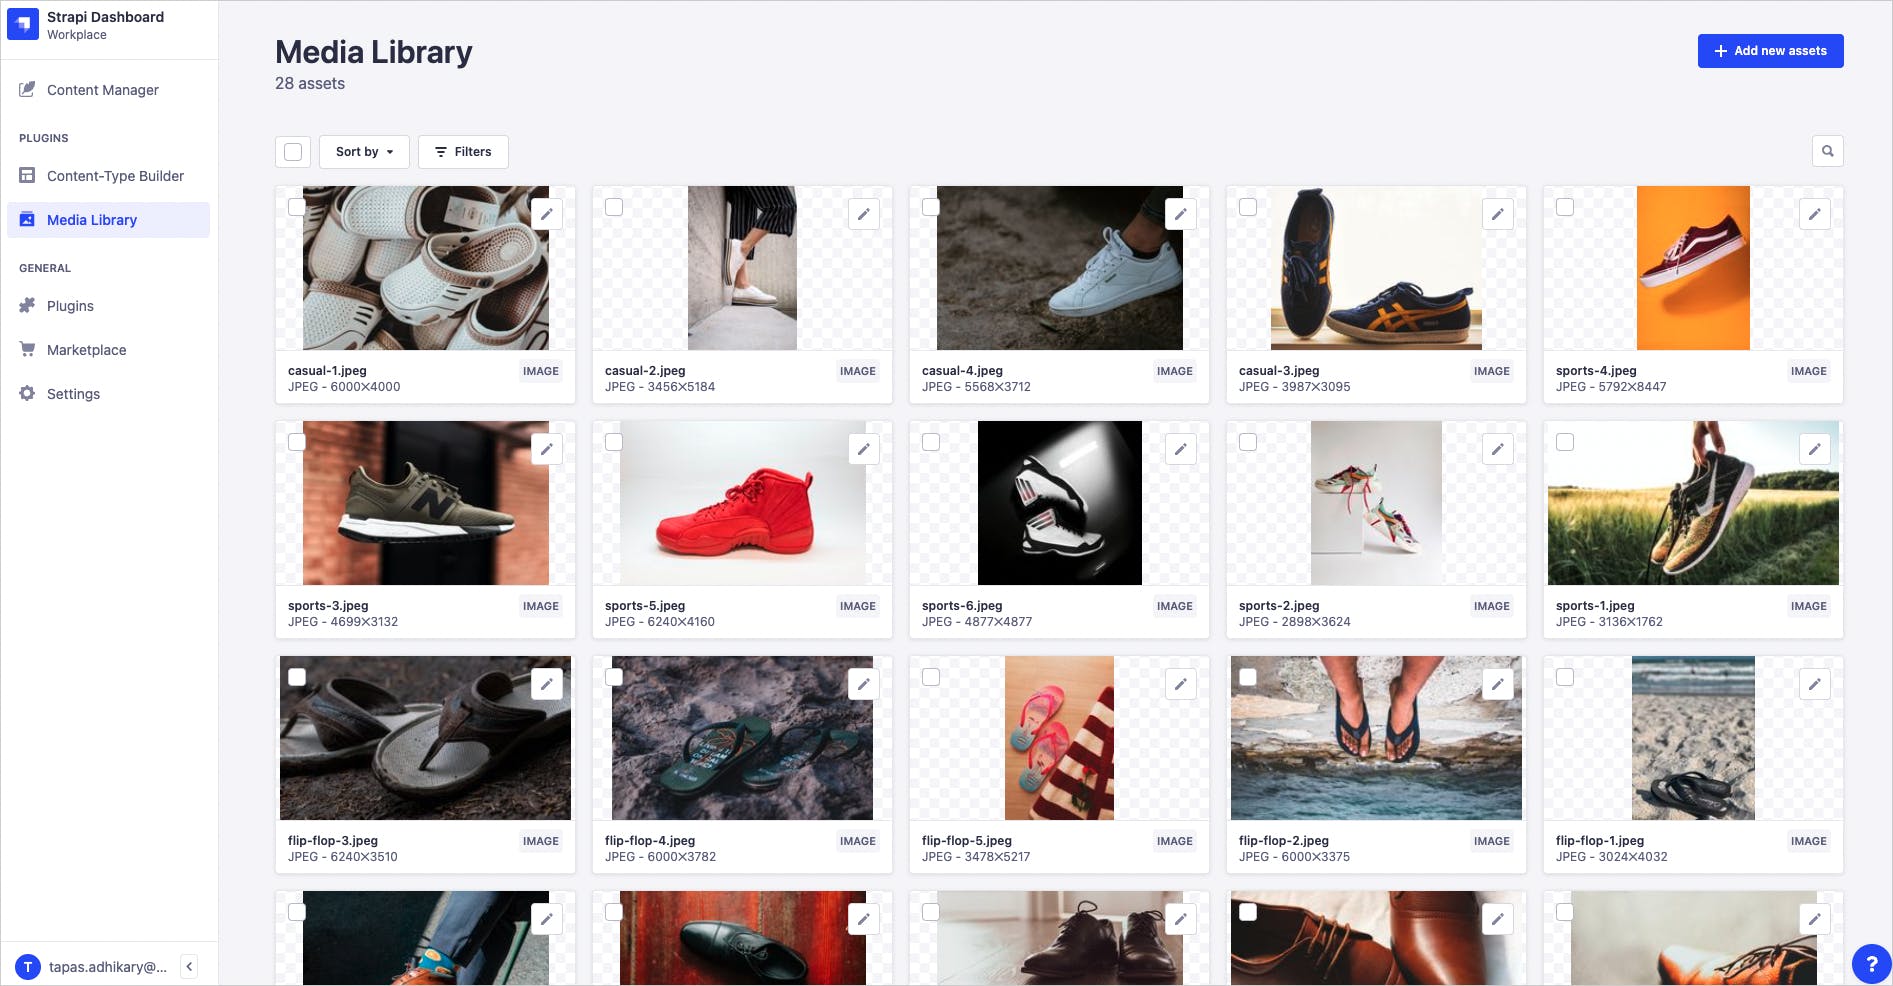
Next, browse the Content Manager option from the left-side navigation and start creating entries for the Category type. You can create the categories mentioned in the image below, or feel free to create your own.
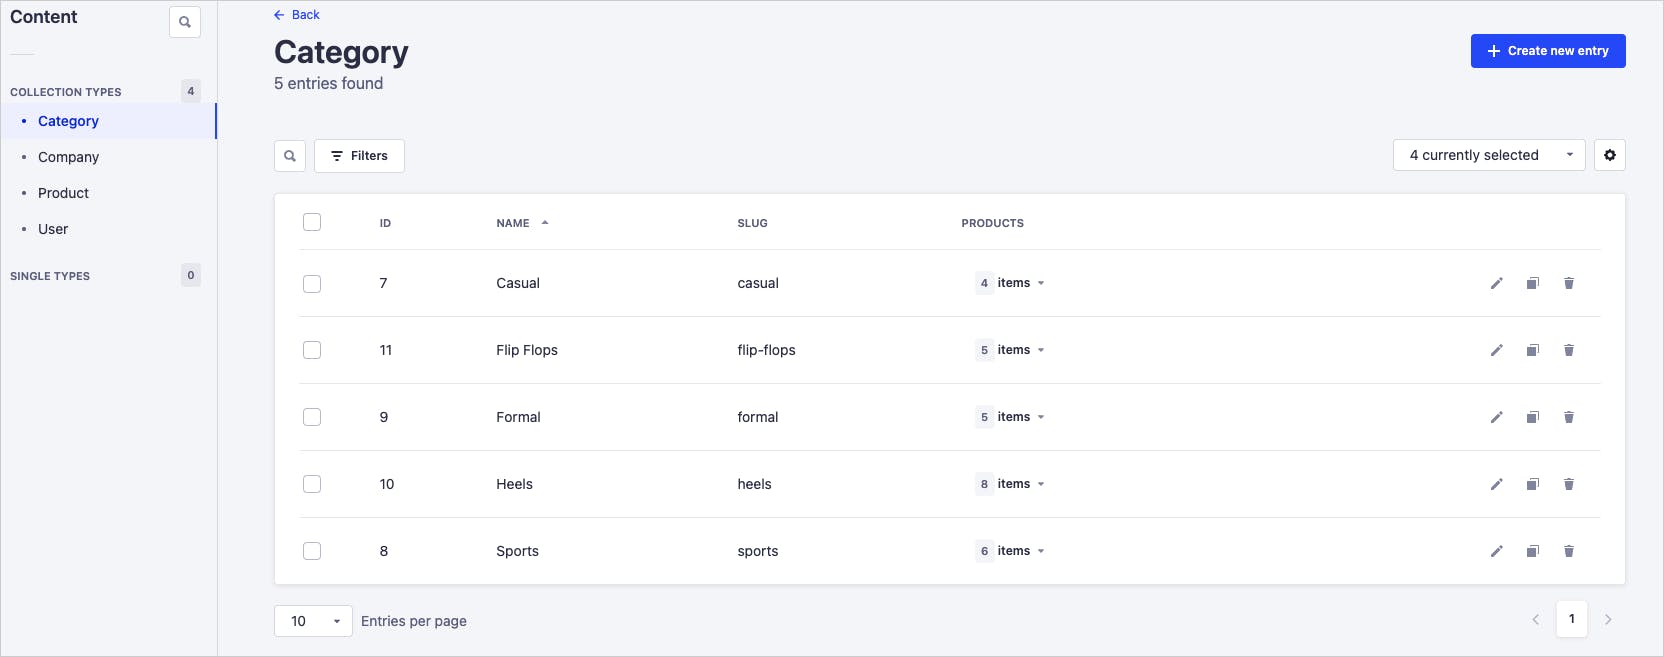
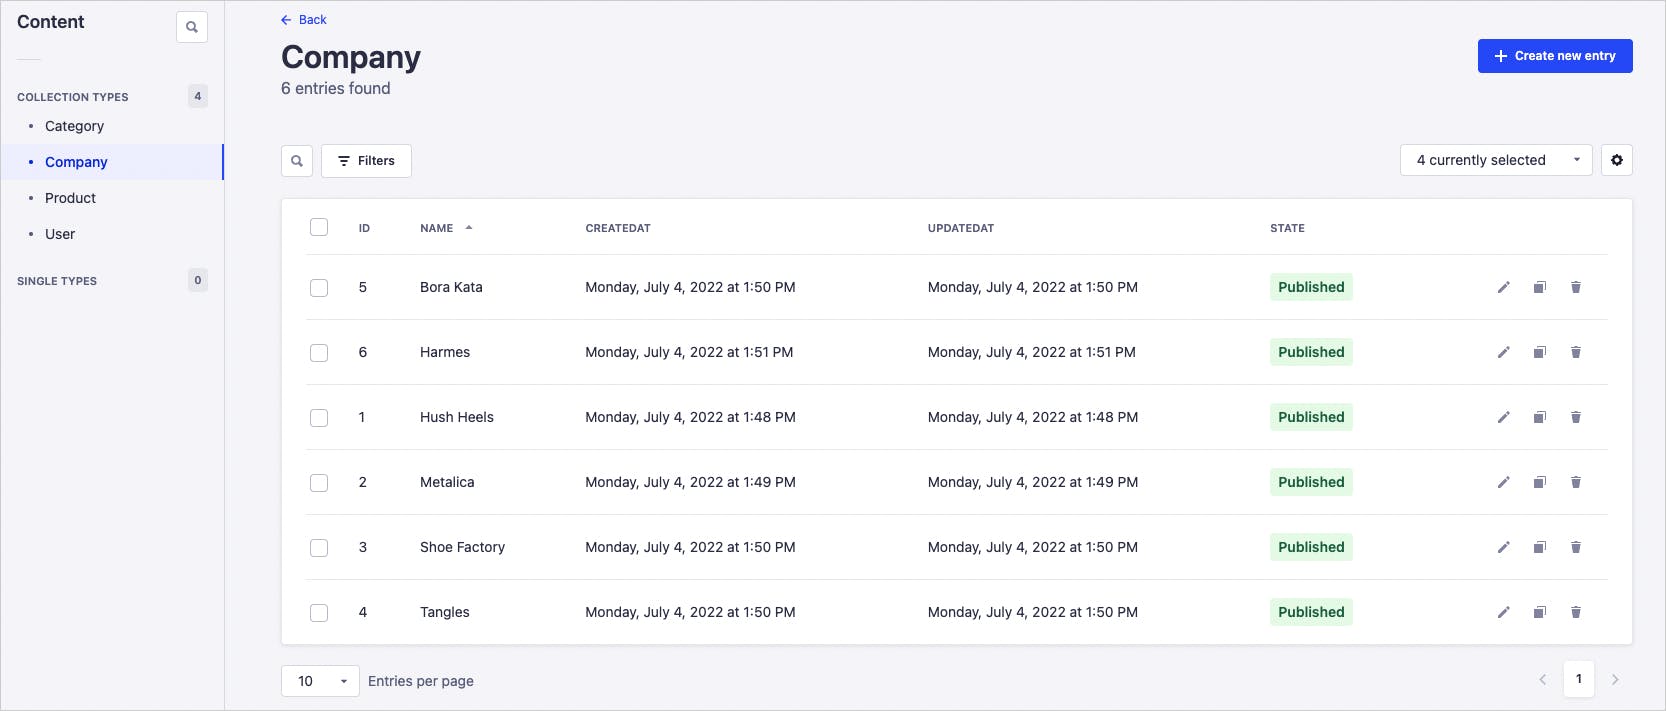
Similarly, insert entries for the Company data.
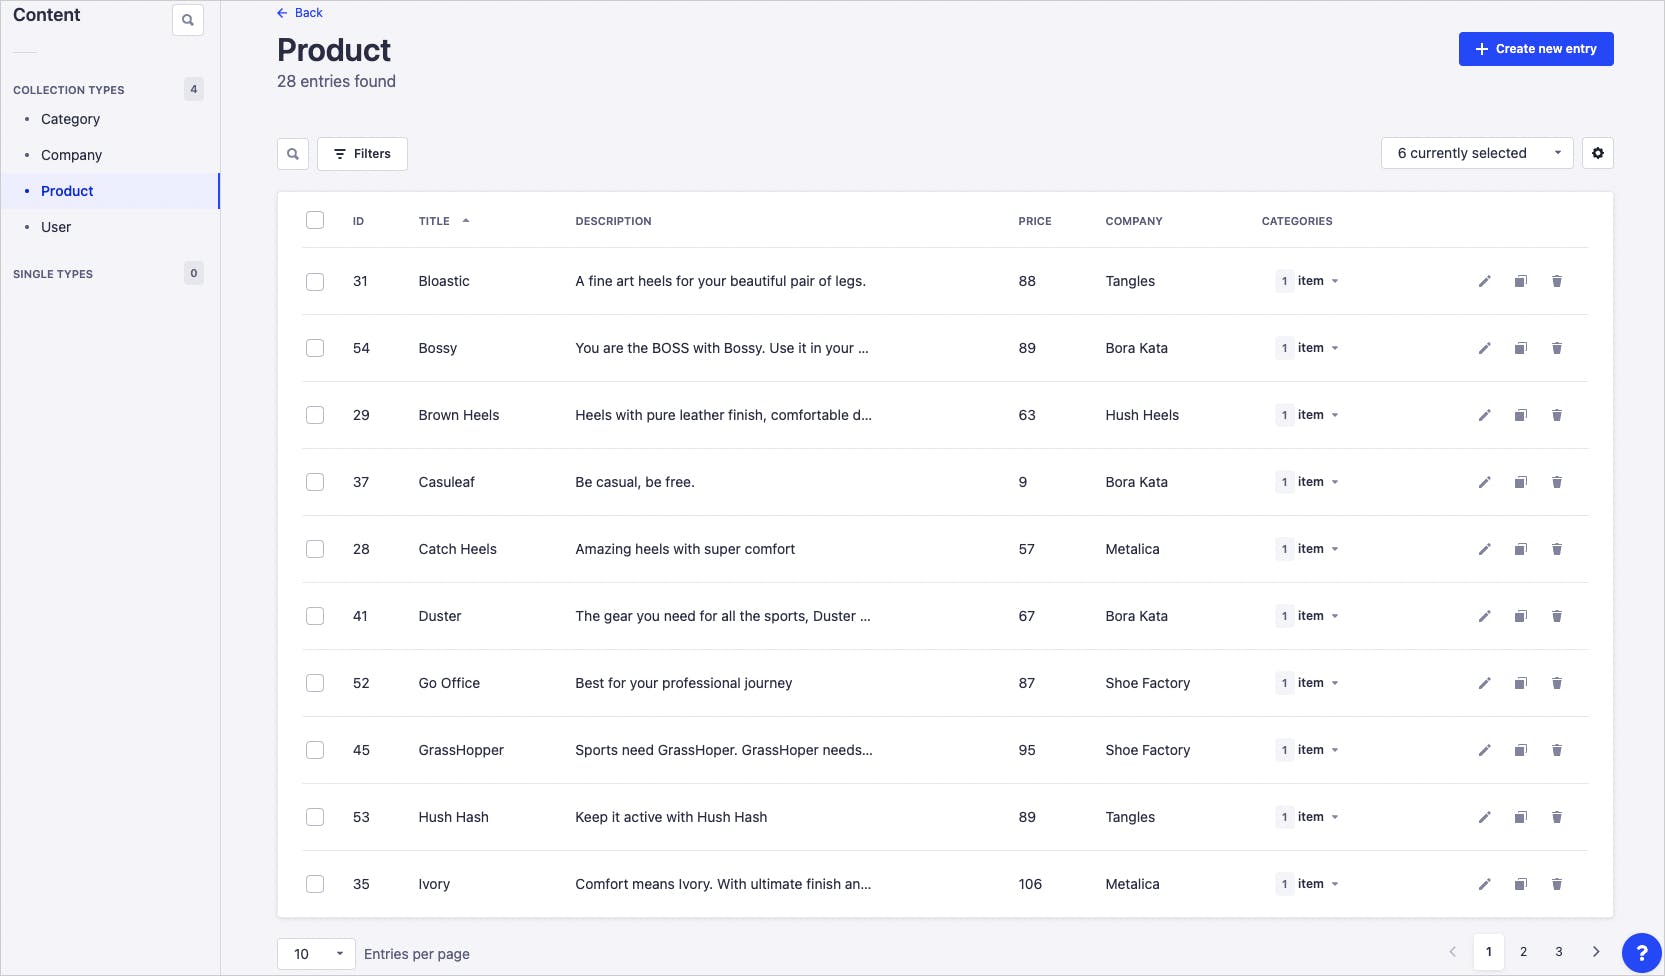
Finally, enter the data for the Product type.
API Tokens
So far, we have created all the required content in Strapi and are about to use all the elements in the UI, with the Strapi APIs. You can access Strapi APIs using REST to GraphQL, but remember you need to obtain an API Token to make successful API calls.
Click on Settings > Global Settings> API Tokens from the left-side navigation bar, and click on the Create new API Token button to create a full-access token for the shoes app. Please keep this token safe with you, because we’ll be using it shortly.

The client using Gatsby
We have successfully set up the datastore with Strapi, and so now it's time to set up the client side with Gatsby.
To do so, open another command prompt/terminal at the project's root folder and execute the following command.
yarn global add gatsby-cli
This command will install the Gatsby Command Line Interface (CLI) globally. This helps us interact with the Gatsby framework to carry out different tasks.
Just like Strapi, Gatsby comes with several templates to create a project. In the Gatsby world, these are called ‘starter templates’. We will use the default starter template to create the project and name the client.
Please execute the following command to create the Gatsby project.
npx gatsby new client https://github.com/gatsbyjs/gatsby-starter-default
The above command will take a while and create the project structure for you. Now change to the client directory and start the app locally using the gatsby develop command.
cd client
gatsby develop
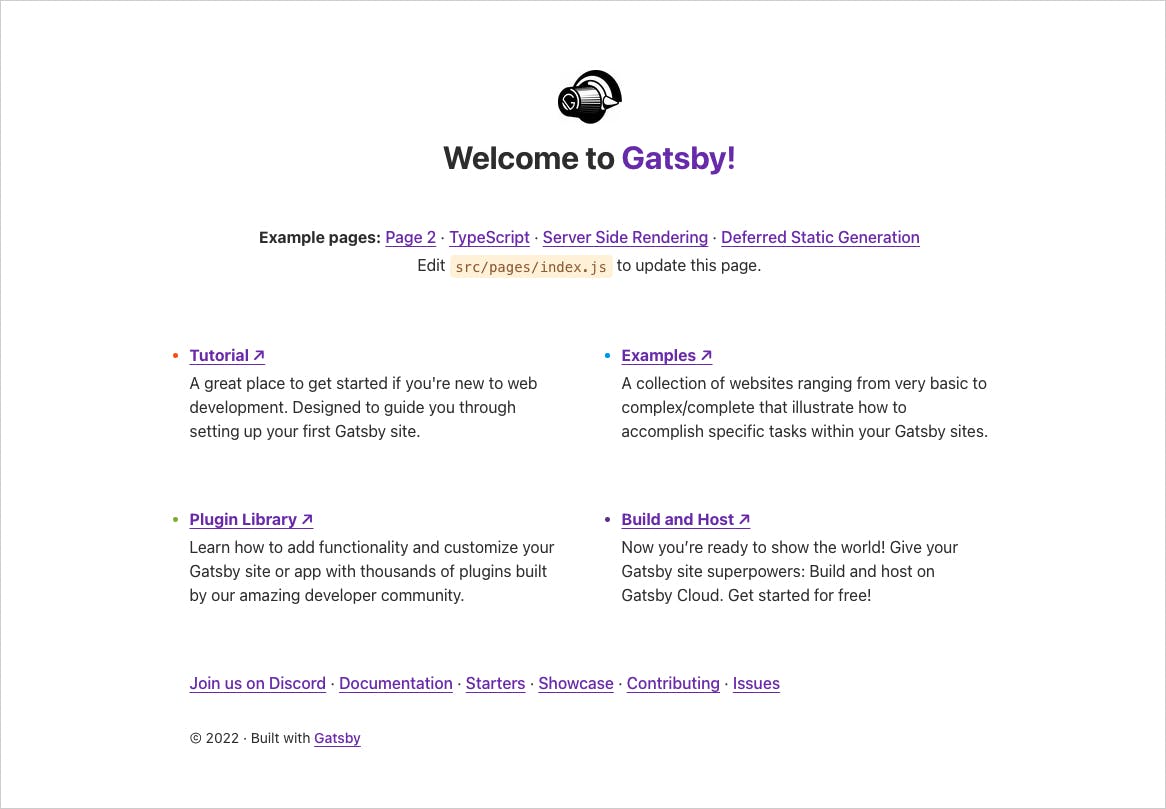
The Gatsby app will run on the [localhost:8000](http://localhost:8000) URL, and you will see a UI like this when you access it using your browser. It's a default page from the starter template we used. We will change it soon.
Gatsby and Strapi: A Better Together Story
So, now we will bring Gatsby and Strapi together to give shape to our app. We will call the Strapi APIs from Gatsby and fetch the shoes data at the build time.
The Gatsby plug-in ecosystem has a source plug-in called gatsby-source-strapi that helps to fetch data from Strapi using GraphQL. Let’s install that plug-in and a few more dependencies for handling images and transformation. Please execute the following command from the terminal in the client directory.
yarn add gatsby-source-strapi gatsby-plugin-image gatsby-plugin-sharp gatsby-source-filesystem gatsby-transformer-remark gatsby-transformer-sharp
Create a file called .env.development at the root of the client folder, with the following content.
STRAPI_TOKEN=<STRAPI-API-TOKEN>
GATSBY_STRAPI_API_URL=http://localhost:1337
Here the <STRAPI-API-TOKEN> is the token you have copied while setting up the Strapi datastore. You can now import the client project in your favourite code editor (like VS Code in my case).
Now, open the gatsby-config.js file and replace the content with the content below. This is a configuration file that defines the site's metadata and plug-in options.
Take a closer look at the options we have defined for the gatsby-source-strapi plug-in: we’ve specified the Strapi API URL, API Token, and the name of collection types we want to interact with.
require("dotenv").config({
  path: `.env.${process.env.NODE_ENV}`,
})

module.exports = {
  siteMetadata: {
    title: `Shoes`,
    description: `The one stop shop for your shoes and footwear needs.`,
    author: `@tapasadhikary`,
    siteUrl: `https://shoes.io/`,
  },
  plug-ins: [
    "gatsby-plugin-gatsby-cloud",
    {
      resolve: "gatsby-source-strapi",
      options: {
        apiURL: process.env.STRAPI_API_URL || "http://localhost:1337",
        accessToken: process.env.STRAPI_TOKEN,
        collectionTypes: [
          {
            singularName: "product",
          },
          {
            singularName: "company",
          },
          {
            singularName: "category",
          },
        ],
      },
    },
    "gatsby-plugin-image",
    "gatsby-plugin-sharp",
    "gatsby-transformer-sharp",
    "gatsby-transformer-remark",
  ],
}
Please stop and restart the gatsby develop function and access the URL http://localhost:8000/__graphql to open Gatsby’s GraphQL explorer.
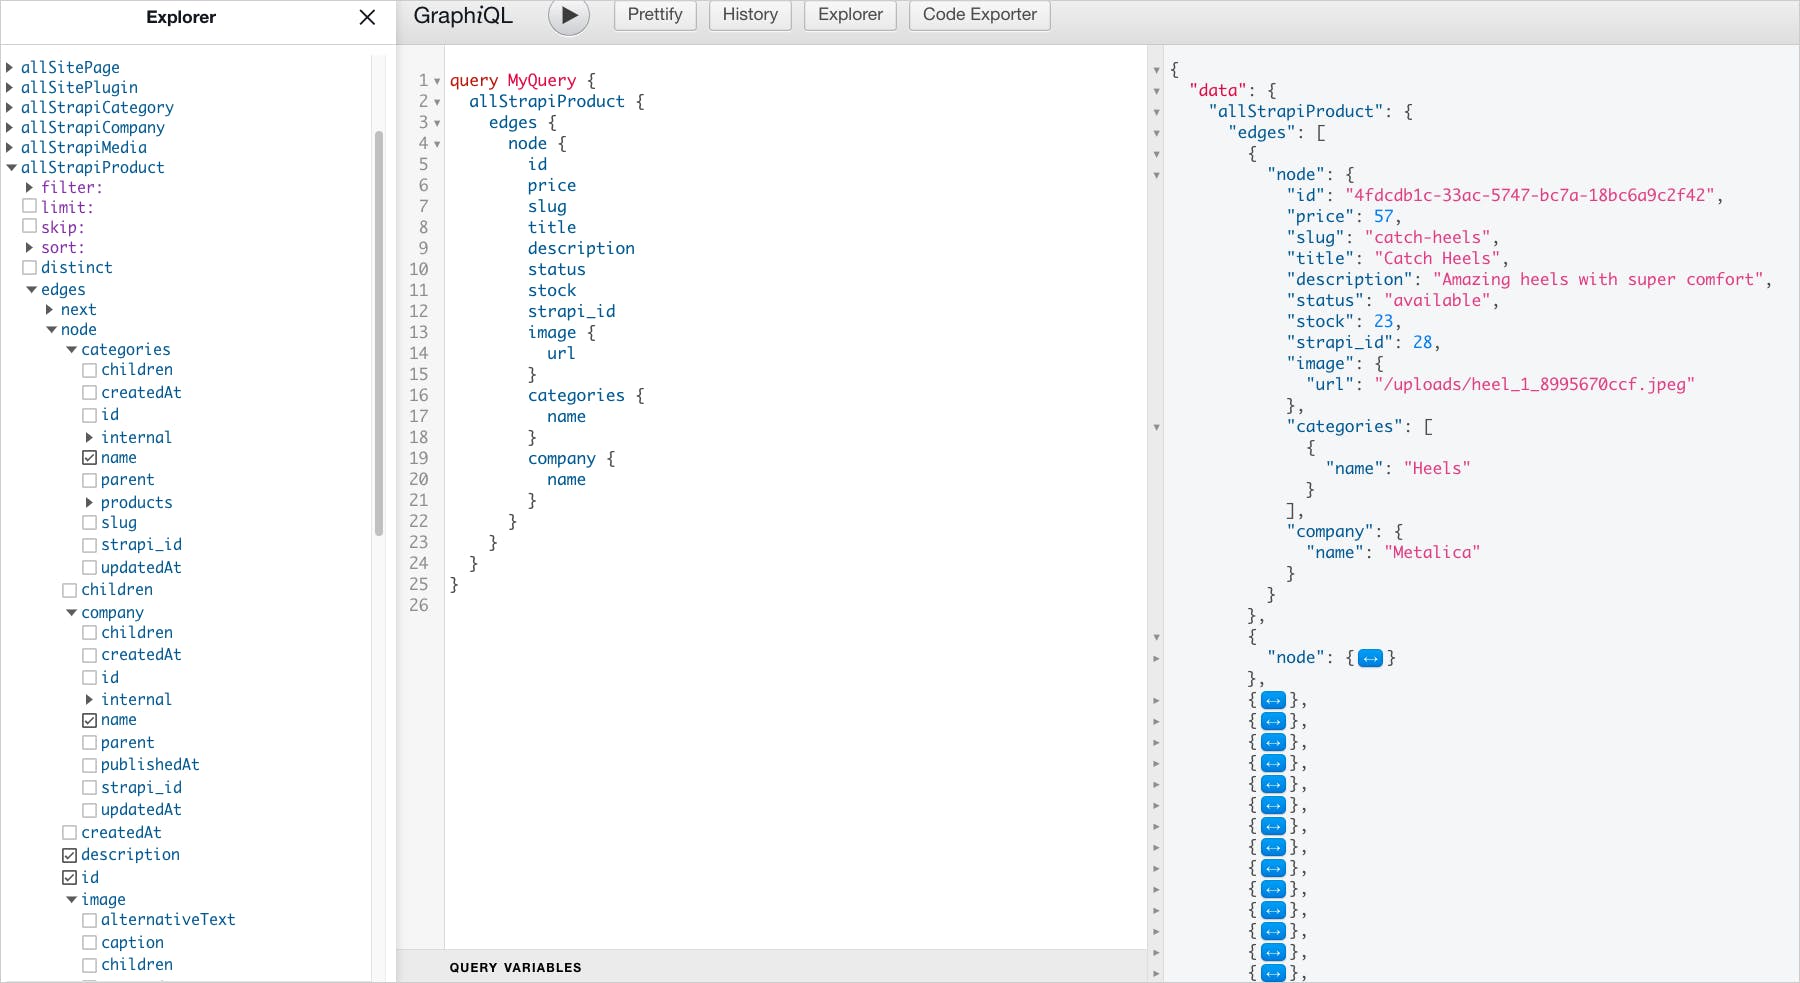
Gatsby provides the GraphQL explorer as a developer tool, so you can build the GraphQL queries easily. You should locate all the Strapi collection types from the left-most Explorer column: they all start with the text allStrapi.
Right, let's now try to build a sample query for the allStrapiProduct collection. You can expand the collection and select the fields for which you want to fetch the data; you’ll see a GraphQL query being created automatically, based on your selection.
Now you can run the query by hitting the ‘run’ button in the header of the middle panel. You can find the output in the right-most panel.
I suggest you spend some time with the GraphQL explorer and play around with queries to get used to it.
To build the GraphQL queries, we will use them to create the UI components. Gatsby is React-based, so you can use the full power of the React library in Gatsby. Simply open the index.js file and replace the existing content with the following code.
// index.js

import * as React from "react"
import Layout from "../components/layout"
import Seo from "../components/seo"
import ShoeList from "../components/ShoeList"

import { useStaticQuery, graphql } from "gatsby"

import '../style/shoes.css'

const IndexPage = () => {
  const { allStrapiProduct } = useStaticQuery(graphql`
    query {
      allStrapiProduct(sort: {order: ASC, fields: title}) {
        edges {
          node {
            image {
              url
            }
            slug
            price
            title
            id
            stock
            status
          }
        }
      }
    }
  `)

  return (
    <Layout>
      <Seo title="Home" />
        <ShoeList shoes={allStrapiProduct.edges} />
    </Layout>
  )
}

export default IndexPage
Now let’s drill into the code in the index.js file. We use a GraphQL query to fetch all the products sorted by the product title in ascending order. Gatsby provides us with a React hook called useStaticQuery to perform a GraphQL query.
Next, we pass the fetched product array (shoes) as a prop to the ShoeList component. We need to create the component that will iterate over the shoes array, and start creating a card layout for each shoe detail.
To do this, please create a file called ShowList.js under the components folder with the following content.
// ShoeList.js

import * as React from "react"
import ShoeCard from "./ShoeCard"
const ShoeList = ({shoes}) => {
  console.log(shoes);
  return (
    <div className="shoe-list">
    {shoes.map((shoe) => (
      <ShoeCard key={shoe.node.id} shoe={shoe.node} />
    ))}
    </div>
  )


}

export default ShoeList
As you notice in the code above, we take out each shoe detail and pass them as props to another component, ShoeCard. So you need to create a file called ShoeCard.js under the components folder, with the following content.
// ShoeCard.js

import * as React from "react"
import { Link } from "gatsby"

const ShoeCard = ({ shoe }) => {
  return (
    <Link
      to={`/${shoe.slug}`}
      className="shoe-card" >
        <div className="img-container">
          <img src={`${process.env.GATSBY_STRAPI_API_URL}${shoe.image.url}`} alt={shoe.title} />
        </div>
        <div className="details">
          <h2>{shoe.title} - ${shoe.price}</h2>
        </div>
    </Link>
  )
}

export default ShoeCard
The ShoeCard component renders the shoe image, title and price. Later we will reveal the title and price only when the user hovers over a shoe image using the CSS styles.
Also, note that the shoe card is wrapped with a Link. The Link component is from Gatsby, and helps us to link between the pages in a Gatsby application. The Link component has an attribute we use to link to a destination page. In the above example, the attribute value is each shoe's slug value.
We intend to go to a new page when the user clicks on a shoe card; this new page will display more details about a shoe and buying options. But we need to make some changes, and we will do that later. First, we need to focus on preparing the shoe list page with all styling.
Let's tweak the Layout and the Header components a bit. First, replace the content of the layout.js file with the following content. It's fairly similar to the existing layout.js file that comes with the template, but we’ve made some minor styling tweaks.
// layout.js
import * as React from "react"
import PropTypes from "prop-types"
import { useStaticQuery, graphql } from "gatsby"
import Header from "./header"
import "./layout.css"
const Layout = ({ children }) => {
const data = useStaticQuery(graphql`
query SiteTitleQuery {
site {
siteMetadata {
title
}
}
}
`)
return (
<>
<Header siteTitle={data.site.siteMetadata?.title || `Title`} />
<div className="container">
<main className="content">{children}</main>
<footer>
© {new Date().getFullYear()} · Built with ❤️ by <a href="https://www.tapasadhikary.com">Tapas Adhikary</a>
</footer>
</div>
</>
)
}
Layout.propTypes = {
children: PropTypes.node.isRequired,
}
export default Layout
Here is the content of the Header.js file you need to replace in the existing file.
// Header.js

import * as React from "react"
import PropTypes from "prop-types"
import { Link } from "gatsby"

const Header = ({ siteTitle }) => (
  <header>
    <Link to="/" className="logo">
    👠 {siteTitle}
    </Link>
  </header>
)

Header.propTypes = {
  siteTitle: PropTypes.string,
}

Header.defaultProps = {
  siteTitle: ``,
}

export default Header
Now, let’s create a style folder under the src directory. To do so, create a shoes.css file under the style folder with the following content.
@import url("https://fonts.googleapis.com/css2?family=Poppins:wght@300;400;500&display=swap");

*,
*::after,
*::before {
  margin: 0;
  padding: 0;
  box-sizing: border-box;
  scroll-behavior: smooth;
}
html {
  overflow: auto;
}

body {
  height: 100vh;
  background-color: rgb(3, 28, 34);
  color: #ffffff;
  font-family: "Poppins", sans-serif;
}

a {
  text-decoration: none;
  color: #ffffff;
}

header {
  display: flex;
  justify-content: space-between;
  align-items: center;
  background-color: #282d2e;
  padding-left: 0.5rem;
  padding-right: 0.5rem;
  margin: 0 0 0.5rem 0;
}

header .logo {
  font-size: 2rem;
  font-weight: 500;
  color: #ffffff;
  padding: 0.5rem;
}

footer {
  width: 100%;
  padding: 0.3rem;
  background-color: #282d2e;
  text-align: center;
}

footer > a {
  color: #1af41a;
  text-decoration: underline;
}

.btn {
  padding: 10px;
  cursor: pointer;
  font-size: 18px;
  border: none;
  border-radius: 10px;
}

.btn.btn-primary {
  background-color: #40ee10;
  color: #000000;
}

.btn.btn-primary:hover {
  background-color: #70e007;
  color: #000000;
}

.btn.btn-secondary {
  background-color: #ffffff;
  color: #282d2e;
}

.btn.btn-secondary:hover {
  background-color: #282d2e;
  color: #ffffff;
}

.container {
  height: calc(100vh - 73px);
  overflow: hidden;
  display: flex;
  flex-direction: column;
}

.content {
  flex-grow: 1;
  overflow: auto;
}

.shoe-list {
  display: flex;
  flex-direction: row;
  flex-wrap: wrap;
  justify-content: center;
}

.shoe-card {
  position: relative;
  display: flex;
  justify-content: center;
  align-items: center;
  flex-wrap: wrap;
  width: 15rem;
  height: 15rem;
  margin: 1.2rem;
}

.shoe-card .img-container {
  position: absolute;
  top: 0;
  left: 0;
  width: 100%;
  height: 100%;
  z-index: 2;
  transition: all 0.5s ease-in-out;
}

.shoe-card .img-container > IMG {
  width: 15rem;
  height: 15rem;
  object-fit: cover;
  resize: both;
  border-radius: 10px;
}

.shoe-card:hover .img-container {
  transform: translate(-1rem, -1rem);
}

.shoe-card:hover .details {
  transform: translate(1rem, 1rem);
}

.shoe-card .details {
  position: absolute;
  top: 0;
  left: 0;
  width: 100%;
  height: 100%;
  padding: 0.5rem;
  display: flex;
  background-color: #fff;
  z-index: 1;
  align-items: flex-end;
  transition: 0.5s ease-in-out;
  line-height: 1rem;
  border-radius: 10px;
}

.shoe-card .details h2 {
  display: block;
  font-size: 1rem;
  color: #000000;
  font-weight: 500;
}
And… that’s it!
Now run the application locally using the URL [http://localhost:8000](http://localhost:8000), and you will see the list of shoe images on the page. Run your mouse over the shoe images, and an animation will reveal the shoe name and the price.
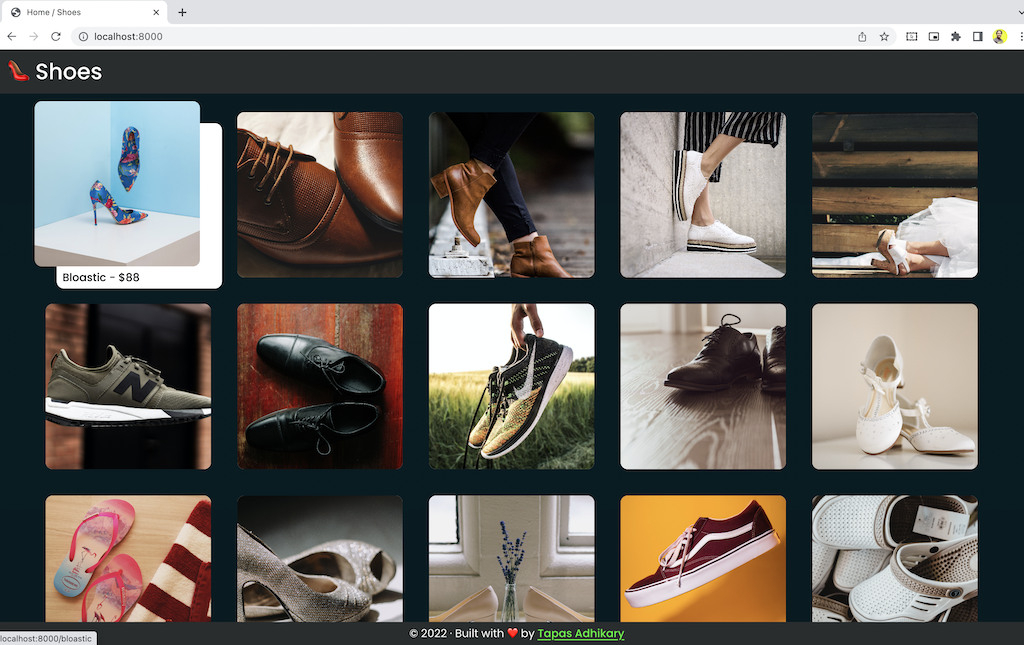
That’s great. So now, try clicking on any of the shoe cards.
Ouch! you get a page like below, and it looks broken. It tried to navigate to a page identified by the shoe’s slug value, without success.
But no worries, we can fix the problem.
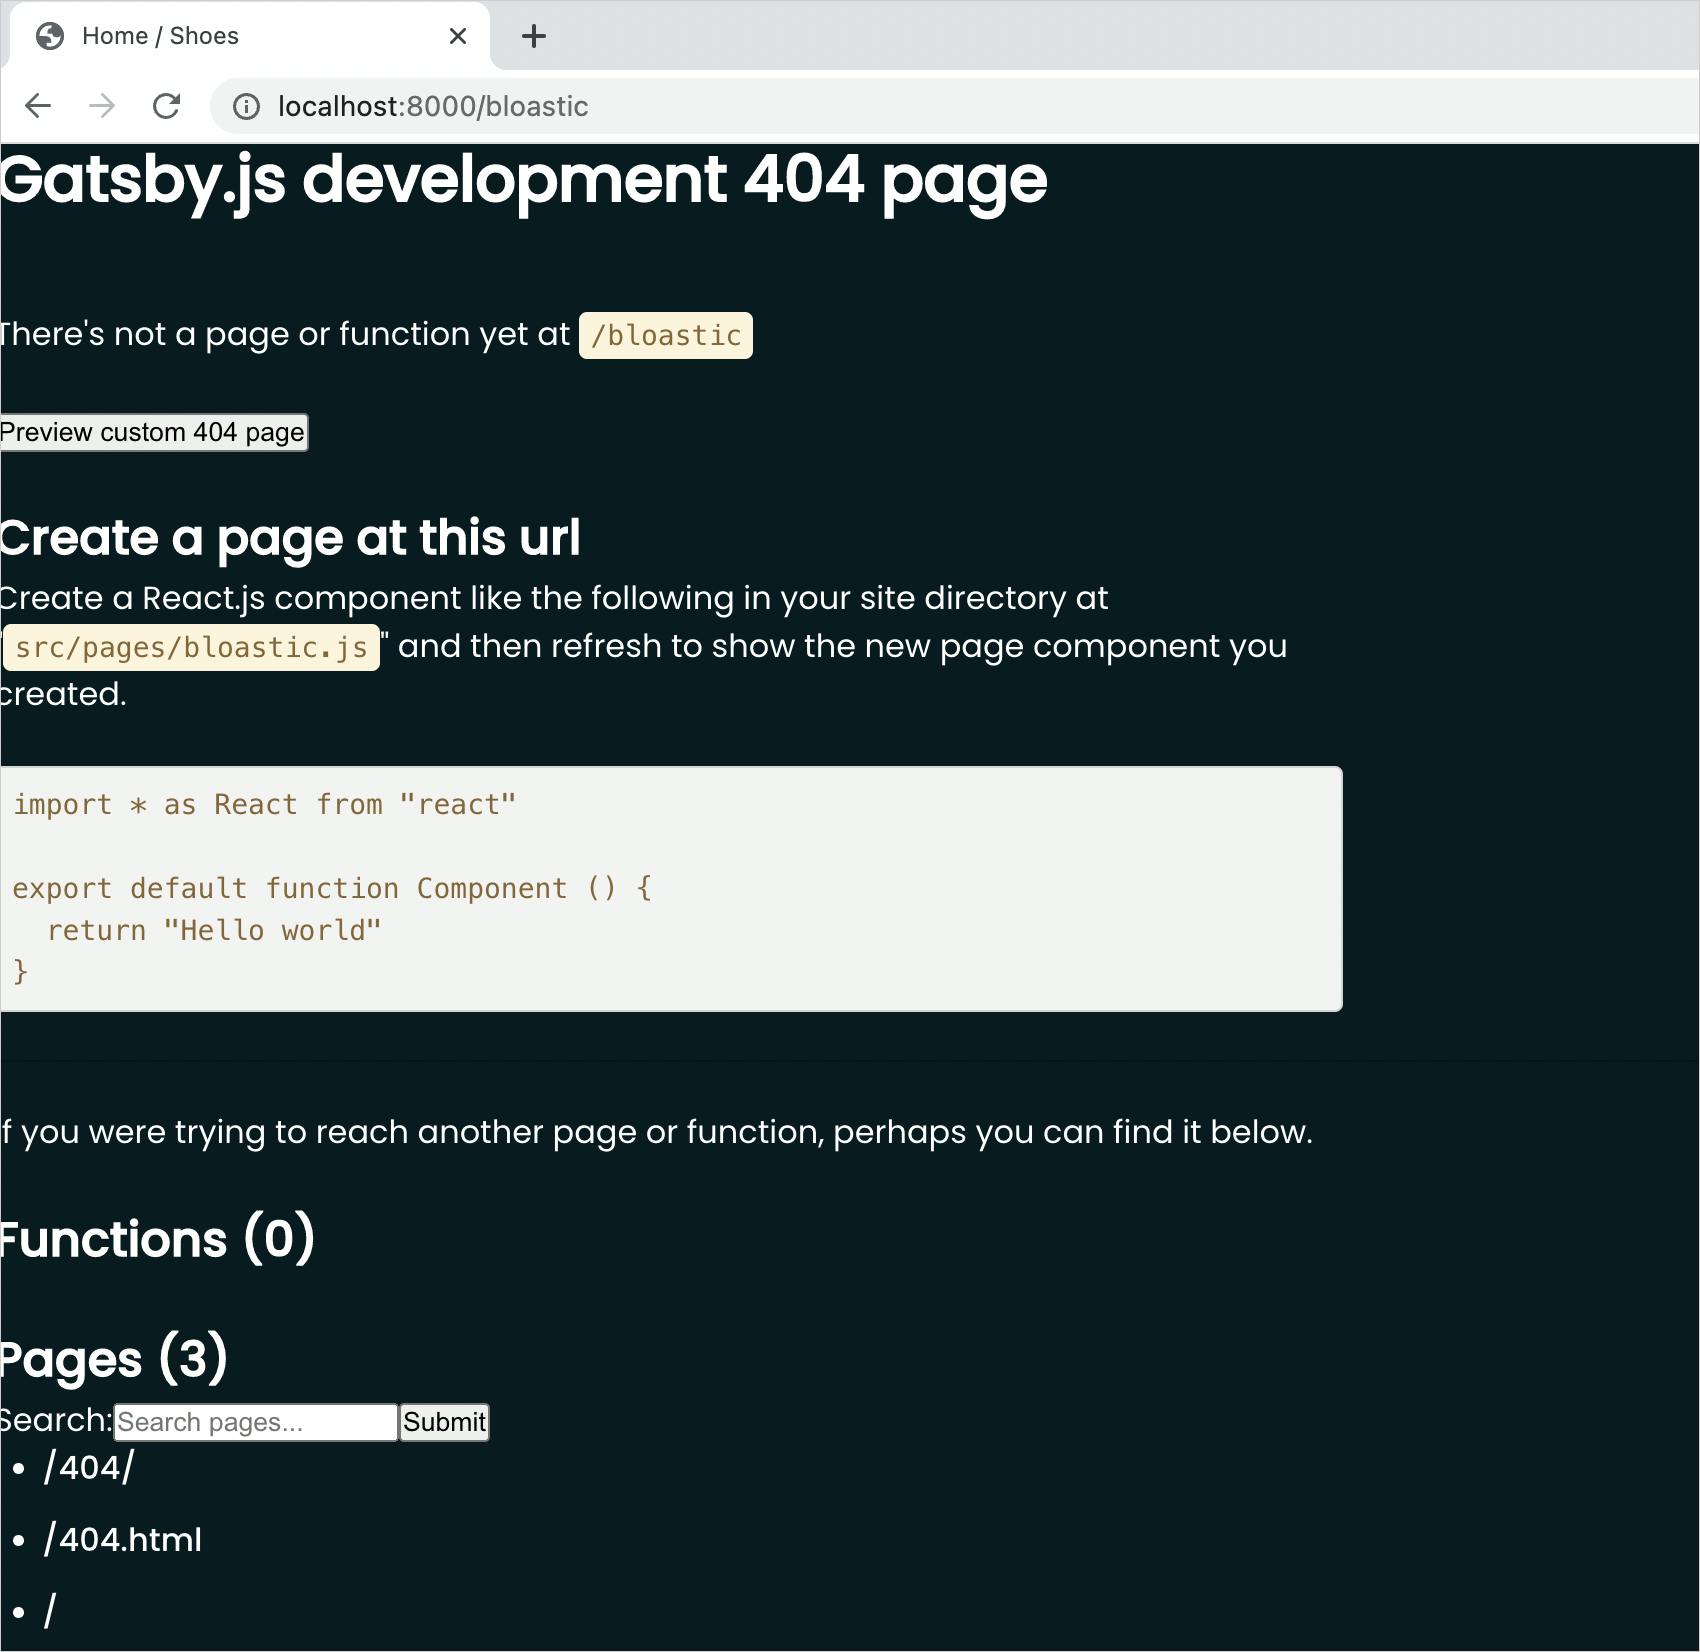
Gatsby can create pages at the build time using templates. These harness the same UI structure you want to use for a different data set.
For example, in our shoes app, we want to show the details of each of the shoes. The details page structure will be the same, but the shoe data will change depending on which shoe image we are clicking on.
So, we can create a template called shoe-details.js under the src/templates folder with the following content.
// shoe-details.js

import React, {useState} from "react"
import { Link, graphql } from "gatsby"
import Layout from "../components/layout"

export default function ShoeDetails({ data }) {
  const shoe = data.strapiProduct
  const [quantity, setQuantity] = useState(1)
  return (
    <Layout>
      <div className="shoe-details">
        <div className="cover">
          <img src={`${process.env.GATSBY_STRAPI_API_URL}${shoe.image.url}`} alt={shoe.title} />
        </div>
        <div className="info">
          <div className="info-heading">
            <h2>{shoe.title}</h2>
            <Link to={`/category/${shoe.categories[0].slug}`}>
              <span>{shoe.categories[0].name}</span>
            </Link> { ' '}
            from {' '}
            <Link to={`/company/${shoe.company.slug}`}>
              {shoe.company.name}
            </Link>
          </div>

          <div className="info-body">
            <p>{shoe.description}</p>
            <span>${shoe.price} per unit</span> { ' - '}
            <>
              {
                shoe.stock > 0 ?
                  <span>{shoe.stock} In Stock</span> :
                  <span>Out of Stock</span>
              }
            </>
          </div>

          <div className="info-purchase">
            {
              shoe.stock > 0 ?
              <>
                <p>
                  I want to purchase {' '}
                  <input
                    type="number"
                    min="1"
                    max={shoe.stock}
                    value={quantity}
                    onChange={(e) => setQuantity(e.target.value)}
                    /> {' '} unit
                </p>
                <p className="price">Total Price: ${quantity * shoe.price}</p>
                <button className="btn btn-primary">Add to Cart</button>
              </> :
              <>
                <p>OOPS!!! That's gone. We will let you know when the fresh stock is available.</p>
                <button className="btn btn-secondary">Notify Me!</button>
              </>
            }

          </div>

        </div>
      </div>
    </Layout>
  )
}

export const query = graphql`
  query($slug: String!) {
    strapiProduct(slug: {eq: $slug}) {
      id
      title
      price
      status
      stock
      categories {
        name
        slug
      }
      company {
        name
        slug
      }
      description
      image {
        url
      }
      updatedAt
    }
  }
`
In the above code, we perform a GraphQL query to fetch the details of a product (shoe) based on the slug value.
We can use the product details to build the structure when we fetch the product details. In this case, the structure includes the photo of the product and information like category, company, price, and stock. The page also includes the input number box to specify the quantity of the shoes needed and auto-calculate the total amount to pay for a checkout.
All this is great, but how do we get the slug value of the shoe and map it with the shoe-details template? Let’s try and do that now.
Open the gatsby-node.js file and replace the content with the following code:
// gatsby-node.js

exports.createPages = async function ({ actions, graphql }) {
  const { data } = await graphql(`
    query {
      allStrapiProduct {
        edges {
          node {
            slug
          }
        }
      }
    }
  `)
  data.allStrapiProduct.edges.forEach(edge => {
    const slug = edge.node.slug
    actions.createPage({
      path: slug,
      component: require.resolve(`./src/templates/shoe-details.js`),
      context: { slug: slug },
    })
  })
}
Gatsby runs the gatsby-node.js file at the build time. Here we fetch slugs for all the products, so we can then integrate the slugs and create pages for each of them.
The createPage method takes an object as an argument where we provide the details of the path referenced with the slug and map to which component. Please note that the component is the template file we had seen above. We also pass the context data that is the slug itself.
So each path with the slug value is now mapped to the template file, with the slug value passed as the context. We have already learned how the template component uses this slug value and fetches the details of the product. I hope all the dots are connected well now.
Now open up the shoes.css file and add the following styles below the existing ones. The following styles are for the shoe details page.
.shoe-details {
  padding: 1rem;
  display: flex;
  justify-content: space-around;
  align-items: center;
}

.shoe-details .cover {
  display: flex;
  align-content: center;
  justify-content: center;
}

.shoe-details .cover > IMG {
  width: 30rem;
  height: 30rem;
  border-radius: 50%;
}

.shoe-details .info-heading {
  margin-bottom: 1rem;
}

.shoe-details .info-heading > a {
  color: #1af41a;
  text-decoration: underline;
}

.shoe-details .info-heading > H2 {
  font-size: 3rem;
}

.shoe-details .info-body > P {
  margin: 0;
}

.shoe-details .info-body > SPAN {
  font-size: 1.5rem;
}

.shoe-details .info-purchase {
  margin: 2rem 0 0 0;
  border: 1px solid #4a4545;
  border-radius: 5px;
  padding: 1rem;
  background-color: black;
  display: flex;
  flex-direction: column;
  align-items: center;
  width: 100%;
}

.shoe-details .info-purchase .price {
  font-size: 1.5rem;
  font-weight: 500;
  color: #ffffff;
}

.shoe-details .info-purchase INPUT {
  border: 1px solid #ececec;
  padding: 5px;
  border-radius: 3px;
  font-size: 1rem;
}

.shoe-filtered-list H2 {
  font-size: 2rem;
  font-weight: 500;
  color: #1af41a;
  margin: 0 0 1rem 1rem;
}

@media only screen and (max-width: 900px) {
  .shoe-details {
    padding: 1rem;
    display: flex;
    flex-direction: column;
    justify-content: space-around;
  }
}

@media only screen and (max-width: 600px) {
  .shoe-details .cover > IMG {
    width: 20rem;
    height: 20rem;
  }
}
Now restart Gatsby’s local server and access the app again on localhost:8000. Click on any of the shoe cards; you should see an elegant page, rendering with shoe details.
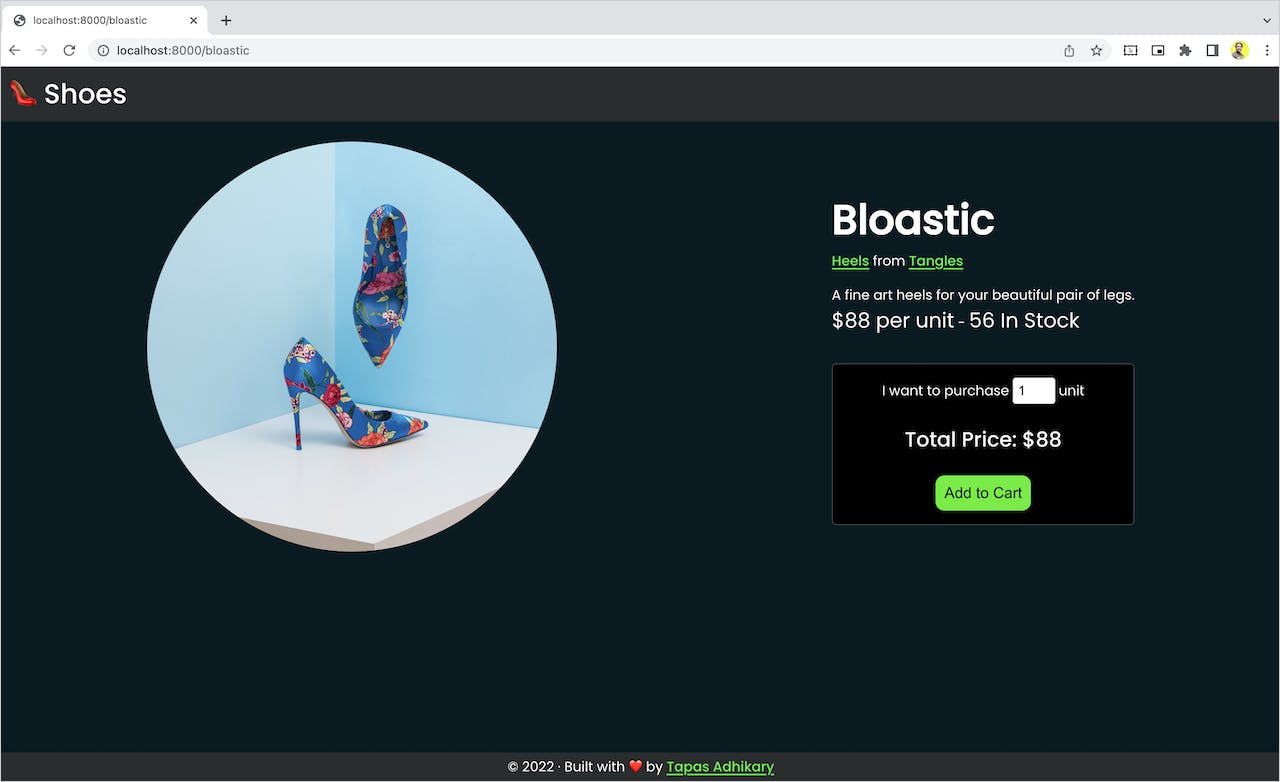
Ok, that’s all we wanted to build with Gatsby and Strapi: a Jamstack shoe store with a couple of pages served statically. And we did it!
However, don’t worry: you can go way further from here. You can create templates for the categories and companies and have pages for each. You can develop search functions and create filter options for shoes by title, price range, company, and category. The project code is open source under the MIT license on GitHub.
As a quick recap, check out the quick demo video below. It is a demo of the shoes app we built in this article, along with a few extra functionalities mentioned above.
Before We End…
I hope you found this article insightful and learned how to use Strapi and Gatsby together to build an application. If you liked this post, you’ll find these articles useful too:
Let's connect. If you have further questions, doubts, or want to discuss anything about this topic, you can connect with me on,
Also, please Subscribe to my YouTube Channel
Keep writing, and keep sharing knowledge 😍 😍