How I used HarperDB Custom Functions and Recharts to create Dashboard
The custom functions from HarperDB let you create APIs on the go. Learn how to create a dashboard using Recharts and HarperDB custom functions.
Last summer, I got a chance to explore HarperDB - a fast, flexible database that allows you to perform rapid application development, distributed computing, SaaS, and many more. I've developed a book library app(named flicks) with HarperDB and GatsbyJS. You can find more about it from here.
Recently, HarperDB announced the release of their most anticipated feature called Custom Functions. In this article, we will learn all about the custom functions and how you can use them in practice.
What are we building?
We will create a simple dashboard to showcase a few analytics of book usages in an online library to make learning more enjoyable. Usually, an administrator(or owner) of the site would be interested in knowing various metrics about it.
So, we will create APIs with the help of HarperDB custom function and visualization using a Reactjs based library called Recharts.
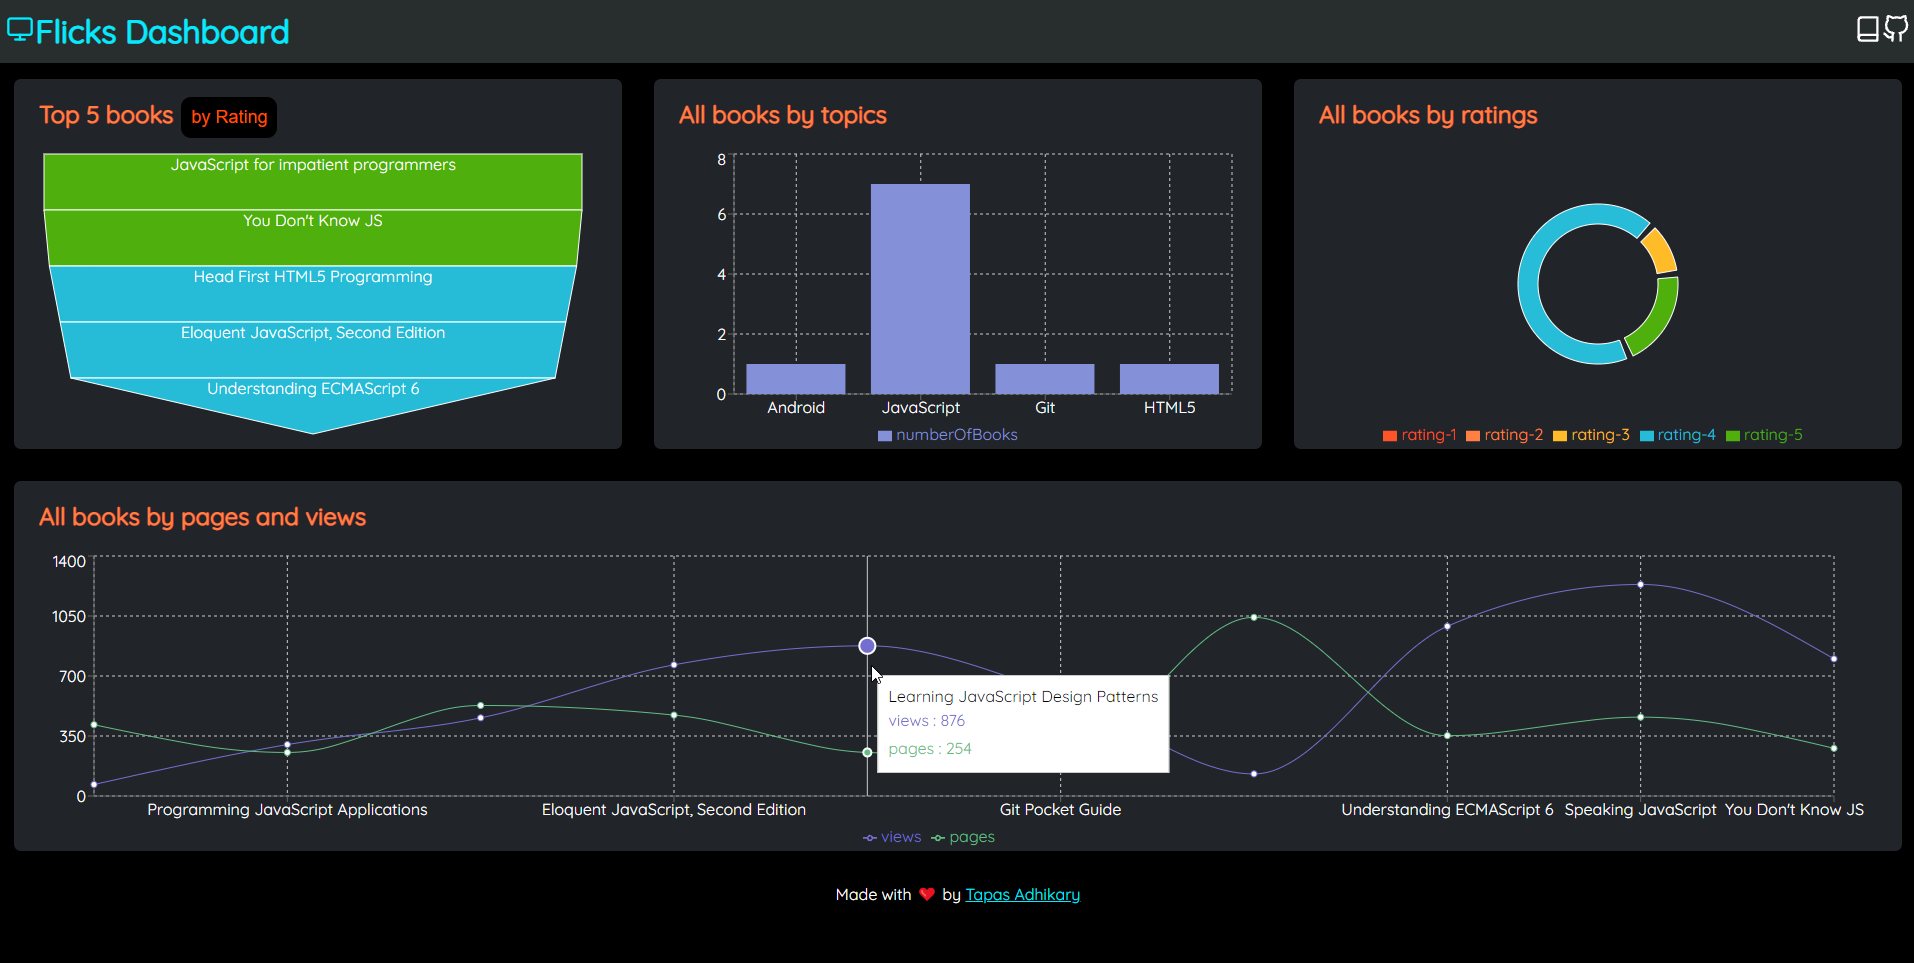
Let's learn how to build it from scratch.
TL;DR
If you want to get to the source code or the demo faster, here are the links:
Setting up HarperDB on cloud
To set up HarperDB in a serverless way, we need to configure a cloud instance. But first thing's first, let's create an account with HarperDB.
Please browse to https://harperdb.io/ and create an account for free. Please click on the link Start Free as shown below. If you have an account already, please sign in using this link, https://studio.harperdb.io/
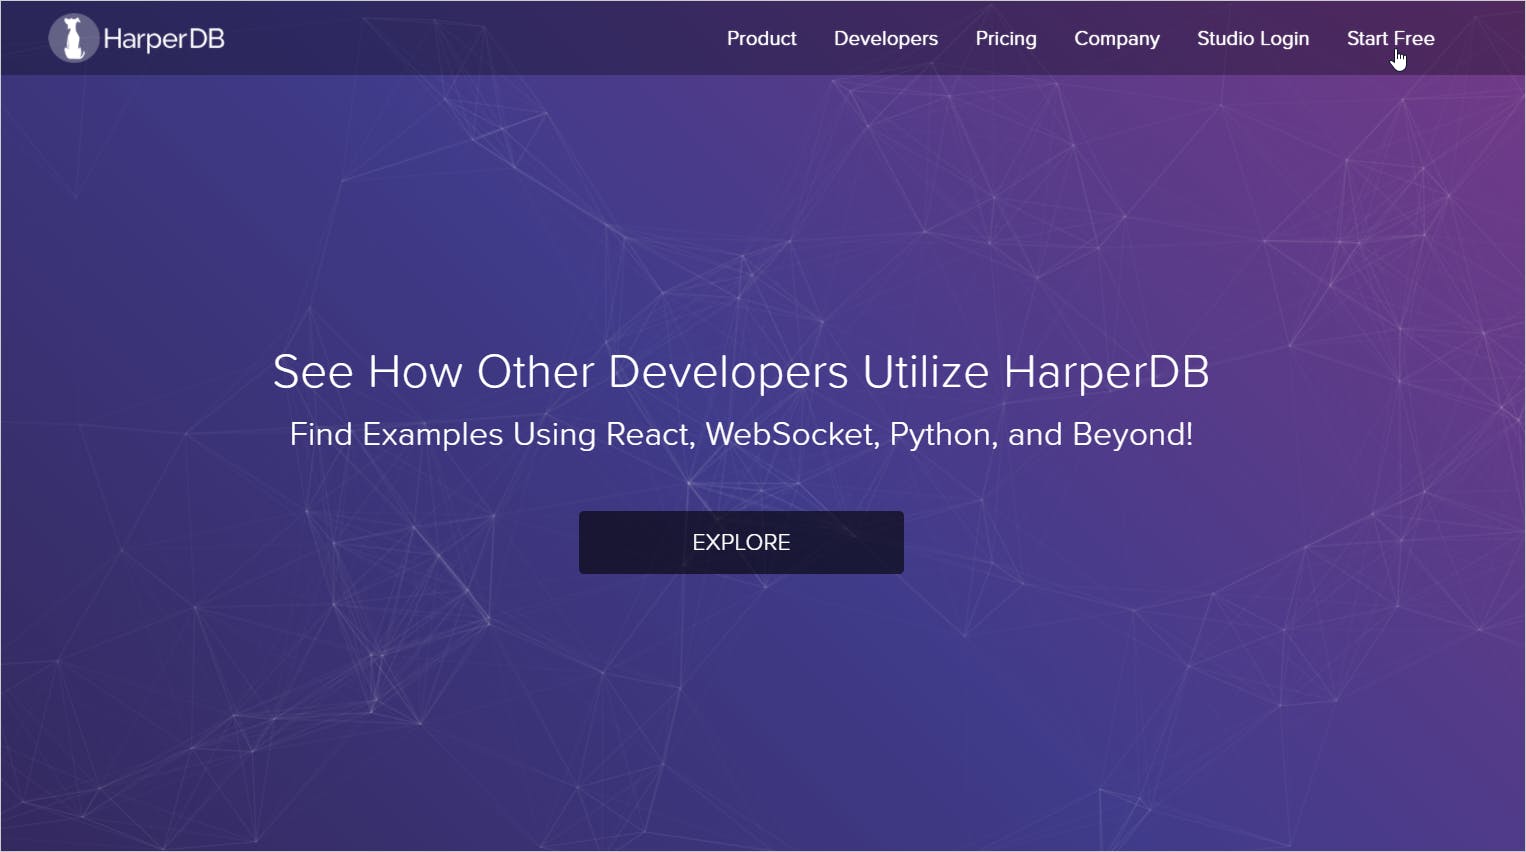 Figure 1.1: Create a Free Account
As part of the signup process, you need to provide the details like name, email, subdomain name. HarperDB will now create a subdomain for you. So please provide the details and sign up for free.
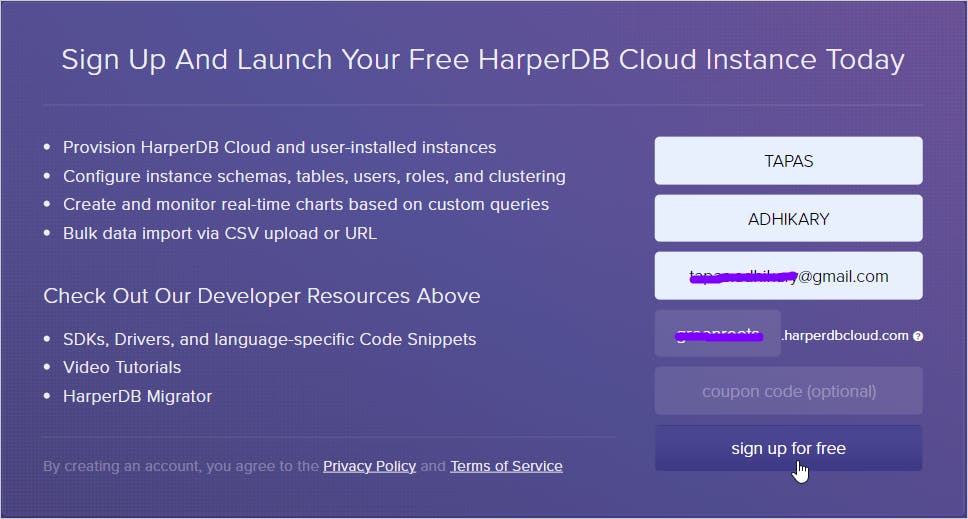 Figure 1.2: Specify Details to Sign Up
In the next step, you need to provide an account password. Please provide a strong password and complete the account creation process.
 Figure 1.3: Specify the Account Password
Now, let's create a HarperDB Cloud Instance. We will use this cloud instance to create and fetch data for our application. Please click on the section Create New HarperDB Cloud Instance to move to the next step.
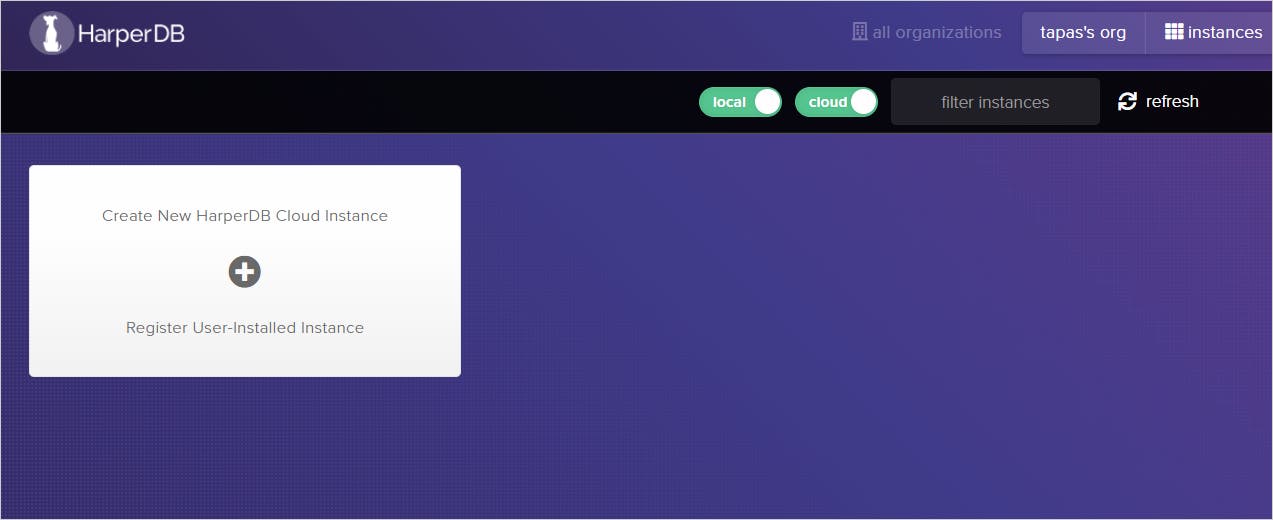 Figure 1.4: Create a HarperDB Cloud Instance
Next, please select the Create HarperDB Cloud Instance as shown in the image below.
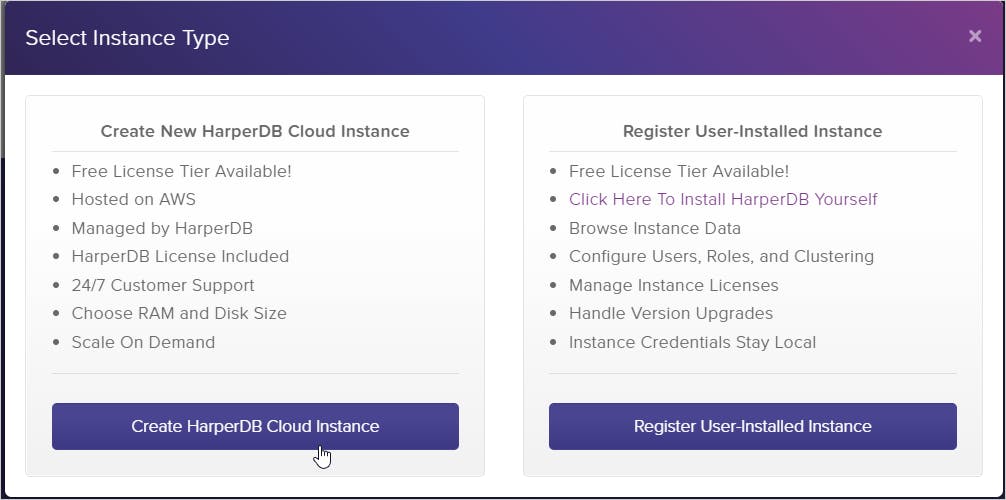 Figure 1.5: Create HarperDB Cloud Instance
Now we have to specify the cloud instance name and credentials. Please provide an instance name of your choice along with the credentials.
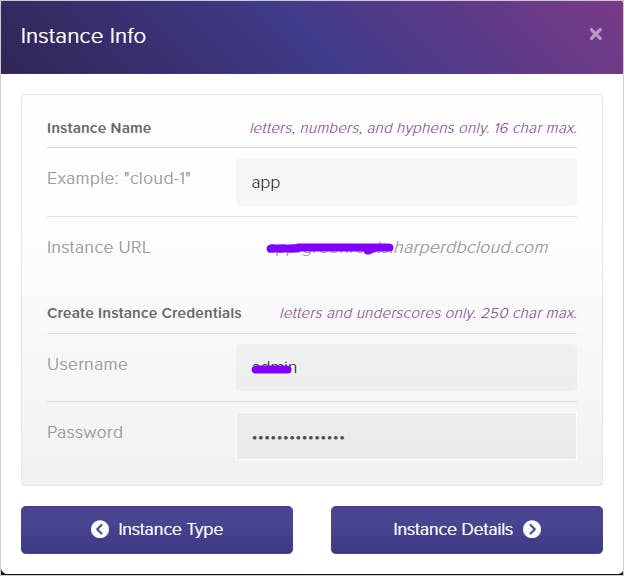 Figure 1.6: Specify Instance Name and Credentials.
Next, you need to select the RAM size, storage size, and other spec details. Please select all the free options.
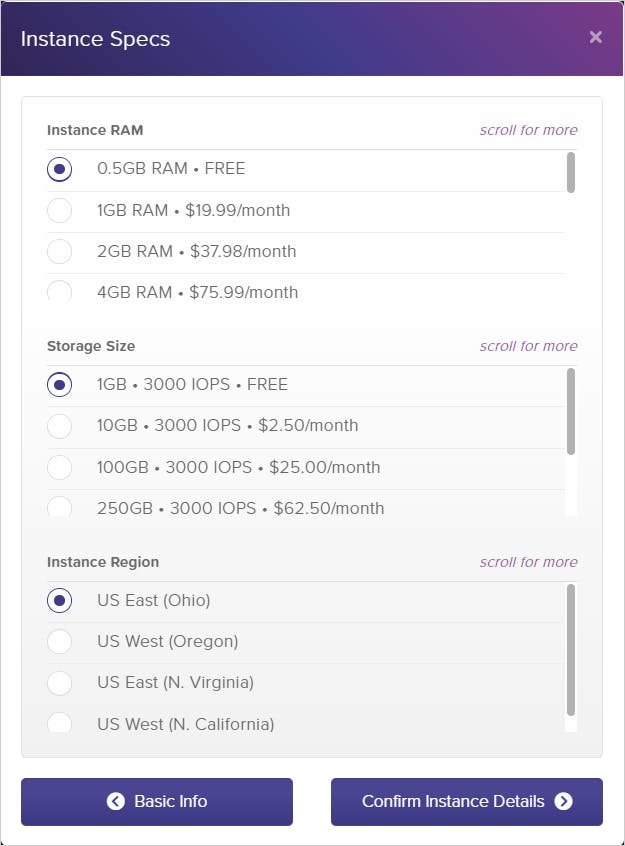 Figure 1.7: Select the specs
The last step is to confirm and add the HarperDB cloud instance. Again, please review the details and click the Add Instance button.
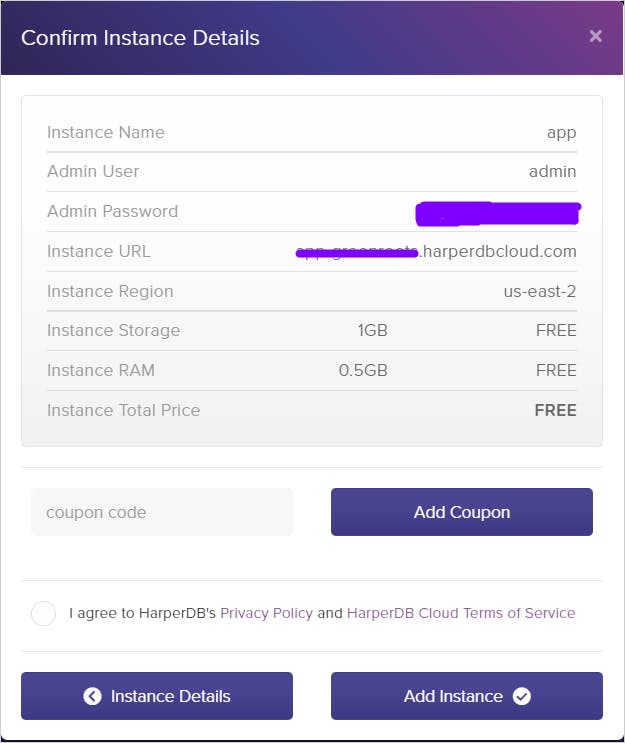 Figure 1.8: Review the instance details and Add
You should see the instance creation getting started.
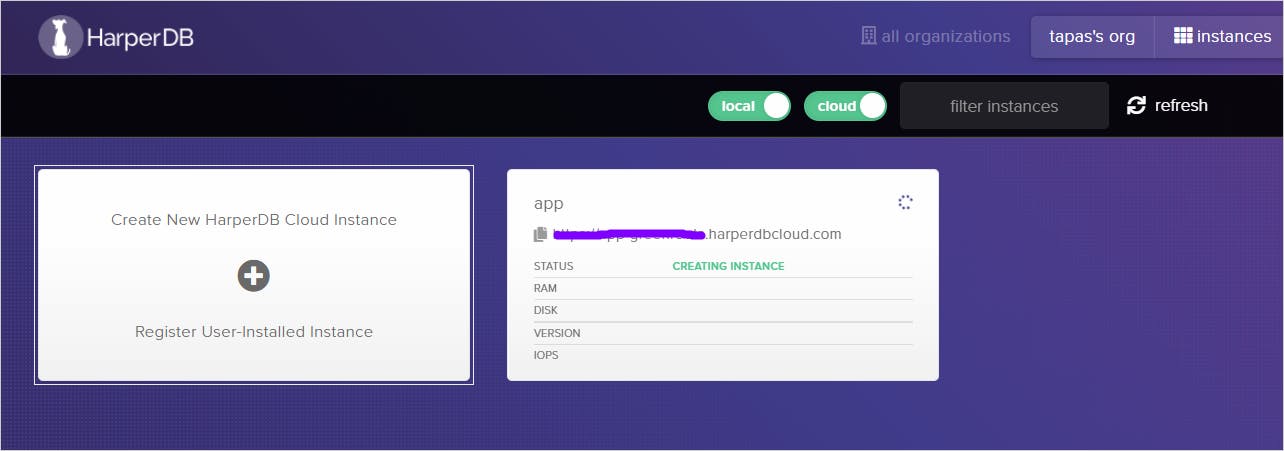 Figure 1.9: Creating Instance is In-Progress
It may take a few minutes. However, you should see the status as OK after a successful HarperDB cloud instance creation.
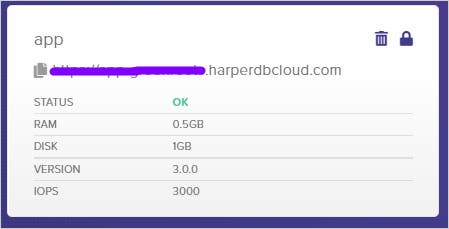 Figure 1.10: Status OK
That's all. We have successfully created a HarperDB Cloud Instance that is ready to use.
Configure the Schema and Table
We need to create a schema and table to insert a few records into the DB. To do that, load the HarperDB cloud instance from the dashboard. First, create a schema by specifying a schema name. For our app, let's give a schema name as library.
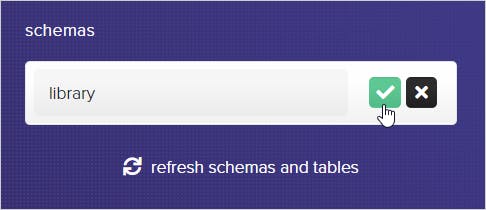 Figure 2.1: Create a Schema
Next, let's specify a table name. Let's specify book as the table name and create. Please note, you have to specify a hash_attribute for the table. HarperDB will auto-generate the value for it. You may manually add it if you want to specify its value. In our case, we will let HarperDB create it. Let's specify the id column as the hash_attribute for the book table.
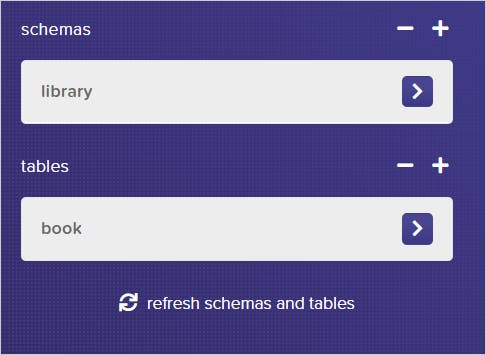 Figure 2.2: Create a Table
Populate data in HarperDB
We will now populate data in HarperDB. We will insert a few records of books into the book table using the HarperDB user interface. You can insert one record by specifying a JSON object or multiple records at once by specifying an array of JSON objects. Let us create a book record by specifying these properties and values,
{
  author: [
    'Kyle Simpson'
  ],
  cover: 'https://res.cloudinary.com/atapas/image/upload/v1622356611/book-covers/you_dont_know_js_1_le1xk5.jpg',
  description: 'No matter how much experience you have with JavaScript, odds are you don’t fully understand the language. As part of the series, this compact guide focuses on new features available in ECMAScript 6 (ES6), the latest version of the standard upon which JavaScript is built.',
  isbn: 9781491904244,
  pages: 278,
  published: '2015-12-27T00:00:00.000Z',
  publisher: 'O\'Reilly Media',
  rating: 5,
  subtitle: 'ES6 & Beyond. It covers all aspects of javaScript deep down.',
  title: 'You Don\'t Know JS',
  topic: 'JavaScript',
  website: 'https://github.com/getify/You-Dont-Know-JS/tree/master/es6%20&%20beyond'
}
Click on the save icon to save the record.
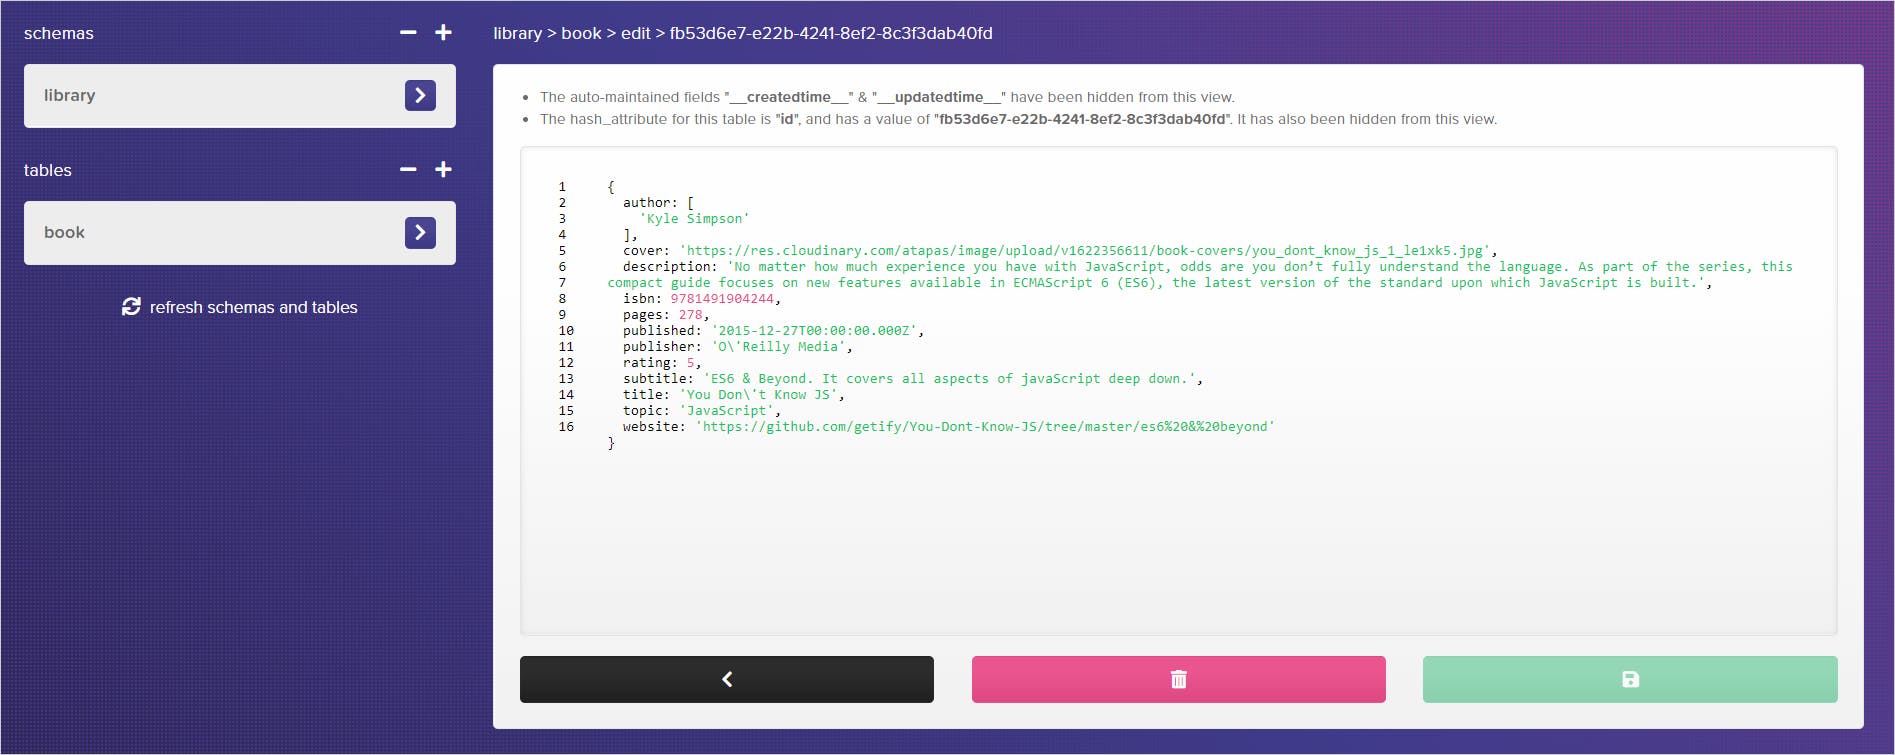 Figure 3.1: Insert a book record
Similarly, you can insert multiple records. So please insert a few more records as the book library must contain more than just one book!
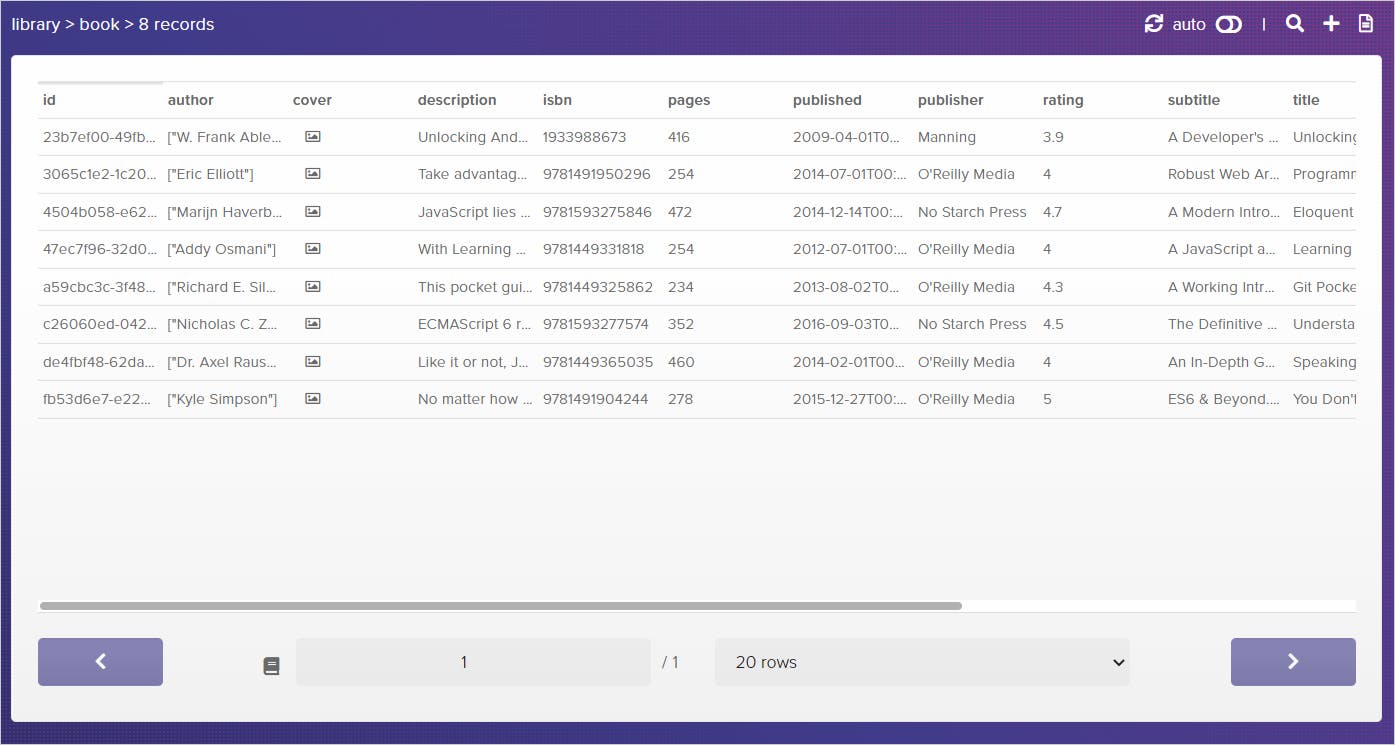 Figure 3.2: Book Records
You can use the JSON data from my GitHub Repository to create multiple records.
Congratulations 🎉 !!! You have completed the database setup with the required data. Now, we will move our focus towards building APIs using custom functions.
What is a custom function?
As part of the 3.1+ release, HarperDB introduced the custom function feature. You can create your API endpoints inside HarperDB without worrying about deploying them to your server. Custom functions are powered by Fastify that allow you to interact with HarperDB core methods to interact with your data.
You can create, manage custom functions from the HarperDB Studio or locally using your IDE and version control system. In this article, we will learn how to manage it using the HarperDB Studio itself.
Create your first custom function using HarperDB studio
To get started, please select the functions option from the HarperDB Studio.
 Figure 4.1: The functions option
Now you need to create a project by specifying a name. Let's create a project with the name library.
 Figure 4.2: Create a project
It will create a few basic project settings for you. The most important one to start with is routes. The route URLs are resolved in the following manner, [Instance URL]:[Custom Functions Port]/[Project Name]/[Route URL].
So for the route / the URL will be,
Similarly, for the route /books, the URL will be,
We can now map each route to handler functions that perform logic to get the required data from the HarperDB data store. So, go to the route file from the functions page and replace the existing content with this,
'use strict';

module.exports = async (server) => {

  server.route({
    url: '/',
    method: 'GET',
    handler: () => {
      return "My Library API";
    }
  });
}
Please notice, here we are mapping the route / with a handler function that returns a string as the response. We also specify that a client needs to use the GET method to request using this route.
Now save your changes for the custom function to deploy. It may take a few seconds. Please open a browser tab and try the API URL in the format we discussed above. In my case, the URL is, /library. You should see the response back on the browser,
 Figure 4.3: First API
Congratulations 🎉!!! You have created your first API using the custom function.
Create APIs to get the book data
The above API is excellent, but it doesn't interact with the book records we created earlier. Let us now use the custom functions to create API endpoints to get data from the book table.
API endpoint to get all the books
Please add the following code to your route file to create an API endpoint to return all the books,
module.exports = async (server, { hdbCore, logger }) => {
  server.route({
    url: '/books',
    method: 'GET',
    handler: (request) => {
      logger.debug(request);
      request.body= {
        operation: 'sql',
        sql: 'SELECT * FROM library.book ORDER BY rating DESC'
      };
      return hdbCore.requestWithoutAuthentication(request);
    }
  });
Notice the route URL as /books, method as GET, and the handler function makes an SQL query to get all the books sorted by rating in descending order. Now save the changes and try this new route /books from the browser or any other API tools like postman,
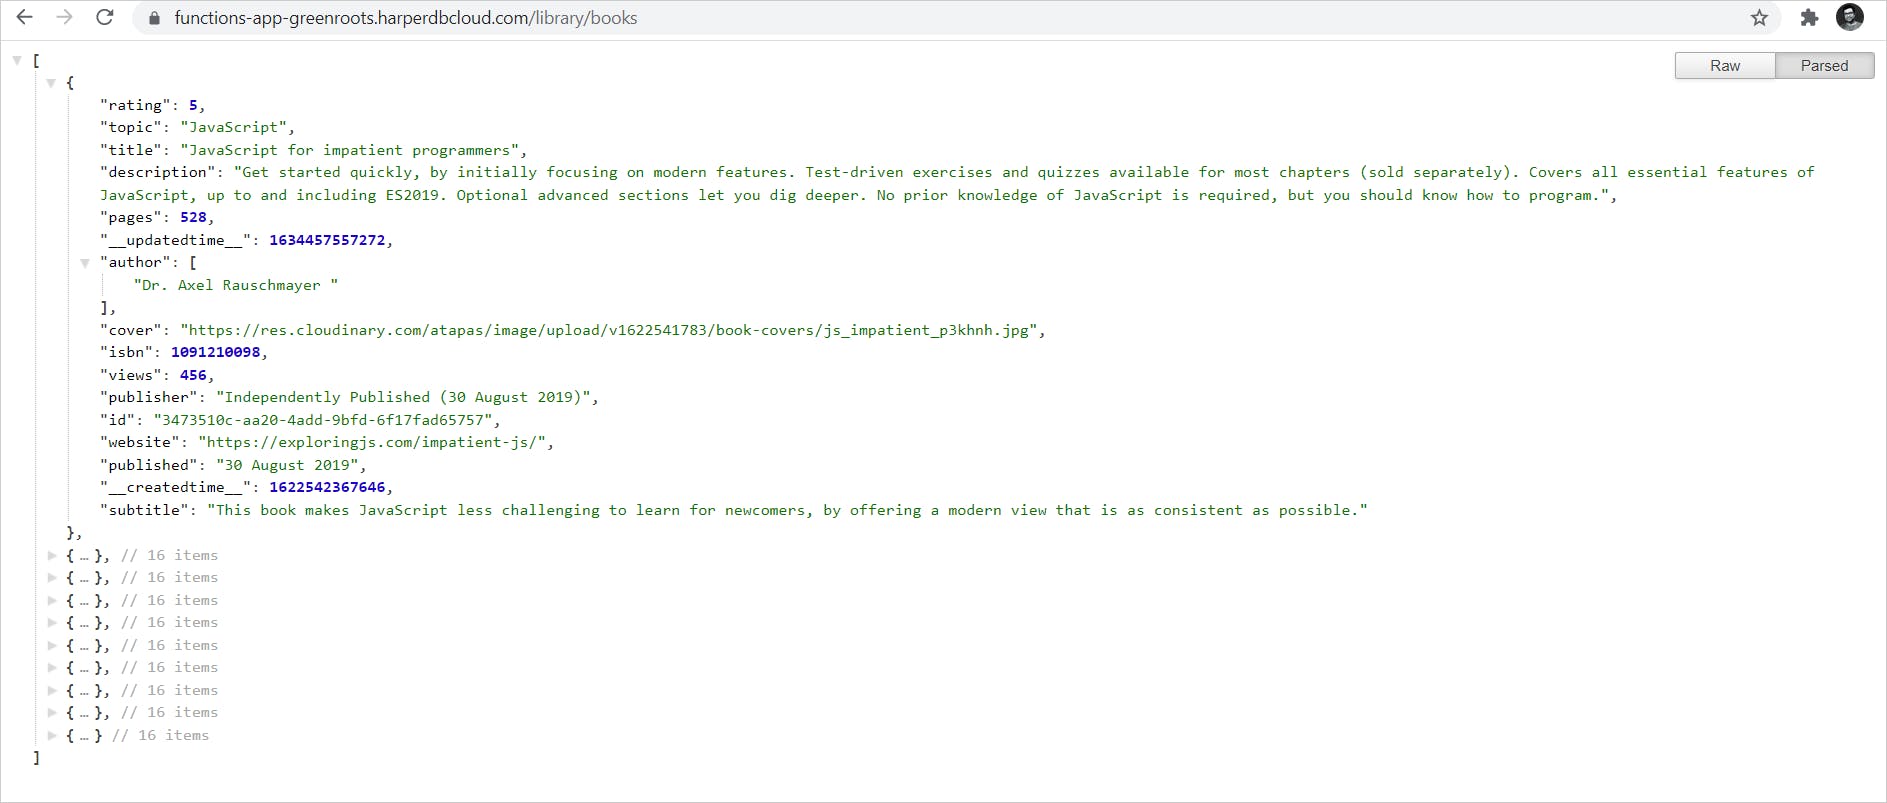 Figure 4.4: All books
API endpoint to get books grouped by topic
Next, let us create an API endpoint to get the books grouped by topics. Please add the following code to the route file.
// GET the books by topic
  server.route({
    url: '/books/by-topic',
    method: 'GET',
    handler: (request) => {
      request.body= {
        operation: 'sql',
        sql: `SELECT COUNT(id) AS numberOfBooks, topic FROM library.book GROUP BY topic`
      };
      return hdbCore.requestWithoutAuthentication(request);
    }
  });
In this case, the route is /books/by-topic, and the handler function gets us a count of books for a specific topic. Save the changes and try the new endpoint to test the response.
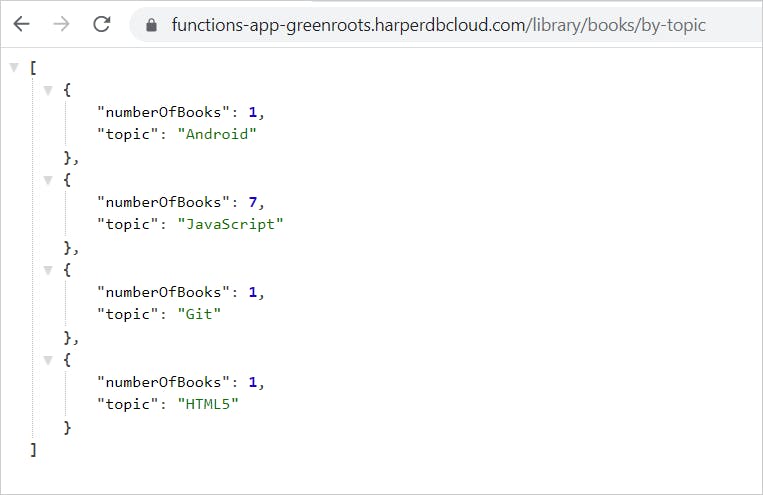 Figure 4.5: Books grouped by topics
Please note, you can create a custom validation hook to validate a request before the handler function executes your query. You can create the validation function in the helper file and import it into your route to use. You can read more from here.
API endpoint to get the views and pages of books
Similarly, let us create one more API endpoint to get the views and pages of books. In this case, we will not return the response from the query as-is. But we will transform it and then return it.
// GET the books by pages and views
  server.route({
    url: '/books/by-pages-views',
    method: 'GET',
    handler: async (request) => {
      request.body= {
        operation: 'sql',
        sql: `SELECT * FROM library.book`
      };
      const result = await hdbCore.requestWithoutAuthentication(request);
      return result.map(book => {
        return {'name': book.title, 'views': book.views, 'pages': book.pages}
      });
    }
  });
As you can see, we are creating a new array with the book's title, pages, and views from the query response and then returning it.
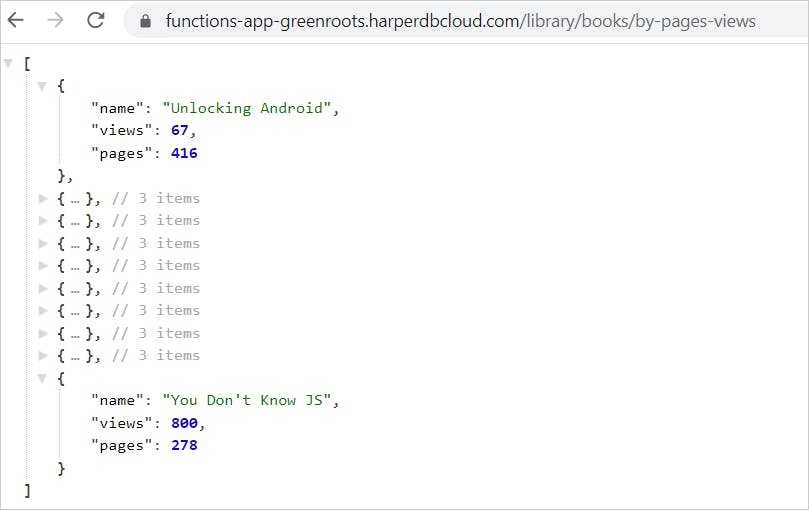 Figure 4.6: Books by view and pages
Like this, you can create new API endpoints for various use-cases. Please find some more custom functions from here.
Now it's time to use these APIs to create some cool visualizations.
Recharts - A D3.js based visualization library for React
Recharts is a D3.js based composable charting library built on React components. It is a popular charting library with plenty of out-of-the-box components. The utilities like a tooltip, axes, labels make it highly usable. The charts are highly customizable.
Here is a Twitter thread that explains how I have analyzed other charting libraries along with Recharts,
Build visualizations using Recharts and APIs
Let us now create a Reactjs app using the Create React App to start using recharts. To do that, install recharts,
npm install recharts # or yarn add recharts
Create a Heading component
First, let us create a Heading component to show a heading for each of the visualizations. It is a simple reactjs component. Please create a file called Heading.js under the src folder with this content,
import React from 'react';

const Heading = ({text}) => {
  return (
    <h2 style={{marginLeft: '25px', color: '#ff7e42'}}>{text}</h2>
  );
};

export default Heading;
Visualize the books grouped by topic using Bar charts
Previously, we have created an API endpoint to get books grouped by topics. Let us now create a visualization using that. We will use the BarChart component of recharts to create the visualization.
Please create a folder called charts under src and create BarByTopics.js with the following content.
import React, { useState, useEffect } from "react";

// Import recharts components
import {
  BarChart,
  Bar,
  XAxis,
  YAxis,
  CartesianGrid,
  Tooltip,
  Legend,
  ResponsiveContainer
} from "recharts";

import Heading from "../Heading";

const BarByTopics = () => {
  const [data, setData] = useState([]);
  const [ isLoading, setIsLoading ] = useState(true);

  // The URL to the API endpoint
  const API_URL = "<Your_Custom_Function_Url>/library/books/by-topic";
  // fetch the data
  useEffect(() => {
    fetch(API_URL)
      .then((res) => res.json())
      .then((data) => {
        setData(data);
        setIsLoading(false);
      });
  }, []);

  // render
  return (
    <div>
    <Heading text={`All books by topics`}/>
    {
      isLoading
      ? (<h3>Loading...</h3>)
      : (
        <ResponsiveContainer width="100%" height={300}>
          <BarChart data={data} margin={{top: 5, right: 30, left: 20, bottom: 5}}>
            <CartesianGrid strokeDasharray="3 3" />
            <XAxis dataKey="topic" />
            <YAxis />
            <Tooltip />
            <Legend />
            <Bar dataKey="numberOfBooks" fill="#8491d8" />
        </BarChart>
      </ResponsiveContainer>
      )
    }
    </div>
  );
};

export default BarByTopics;
First, we import required components from recharts. Then make the API call using fetch and get the data. Last, we render the Barchart using the data.
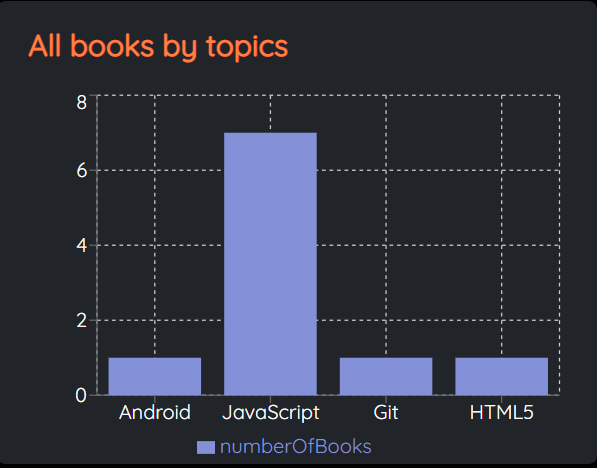 Figure 5.1: Bar chart to show the books grouped by topics
Visualize the pages and views of books using Line charts
Let's create a line chart now. This time we will use the API endpoint to get books with views and pages. We will visualize and compare these two properties of the book using line charts.
Create a file with LineByPagesViews.js under src/charts with the following content.
import React, { useState, useEffect } from "react";

// Import required components from recharts
import {
  LineChart,
  Line,
  XAxis,
  YAxis,
  CartesianGrid,
  Tooltip,
  Legend,
  ResponsiveContainer
} from "recharts";

import Heading from "../Heading";

const LineByPagesViews = () => {
  const [data, setData] = useState([]);
  const [isLoading, setIsLoading] = useState(true);
  const API_URL = "<Your_Custom_Function_Url>/library/books/by-pages-views";

  useEffect(() => {
    fetch(API_URL)
      .then((res) => res.json())
      .then((data) => {
        setData(data);
        setIsLoading(false);
      });
  }, []);

  return (
    <div>
      <Heading text={`All books by pages and views`}/>
      {
        isLoading ? (
          <div>Loading...</div>
        ) : (
        <ResponsiveContainer width="100%" height={300}>
          <LineChart data={data} margin={{top: 5, right: 30, left: 20, bottom: 5}}>
            <CartesianGrid strokeDasharray="3 3" />
            <XAxis dataKey="name"/>
            <YAxis />
            <Tooltip labelStyle={{color: '#000'}}/>
            <Legend />
            <Line type="monotone" dataKey="views" stroke="#746fcf" activeDot={{ r: 8 }} />
            <Line type="monotone" dataKey="pages" stroke="#63bd85" />
          </LineChart>
        </ResponsiveContainer>
        )
      }
    </div>
  );
};

export default LineByPagesViews;
Similar to the Barchart example, we use the data to render the line chart.
 Figure 5.2: Line chart to compare book pages and views
Visualize all books by rating using Pie chat
Now, we will use the by-rating endpoint to visualize the book distributions by ratings. Please create a file with PieByRatings.js under src/charts with the following content.
import React, { useState, useEffect } from "react";

import {
    PieChart,
    Pie,
    Cell,
    Tooltip,
    Legend,
    ResponsiveContainer } from 'recharts';

import Heading from "../Heading";

const PieByRatings = () => {
    const [data, setData] = useState([]);
    const [ isLoading, setIsLoading ] = useState(true);
    const API_URL = "<Your_Custom_Function_Url>/library/books/by-rating";

    useEffect(() => {
        fetch(API_URL )
        .then((res) => res.json())
        .then((data) => {
            const dataArray = [];
            Reflect.ownKeys(data).forEach((key) => {
                dataArray.push({
                    name: key,
                    value: data[key]
                });
            });
            setData(dataArray);
            setIsLoading(false);
        });
    }, []);
    const COLORS = ["#ff5328","#FF8042", "#FFBB28", "#28dfffcf", "#4eaf0d"];

    return(
        <div>
            <Heading text={`All books by ratings`}/>
            {
                isLoading ?
                (<h3>Loading...</h3>) :
                (
                    <ResponsiveContainer width="100%" height={300}>
                        <PieChart>
                            <Pie
                                data={data}
                                cx={'50%'}
                                cy={130}
                                innerRadius={60}
                                outerRadius={80}
                                fill="#8884d8"
                                paddingAngle={5}
                                dataKey="value"
                            >
                                {data.map((entry, index) => (
                                <Cell
                                       key={`cell-${index}`}
                                       fill={COLORS[index % COLORS.length]} />
                                ))}
                            </Pie>
                            <Tooltip />
                            <Legend />
                        </PieChart>
                </ResponsiveContainer>)
            }

        </div>
    )
}

export default PieByRatings;
Like we have seen with the last two charts, here we use the data to create the Pie chart.
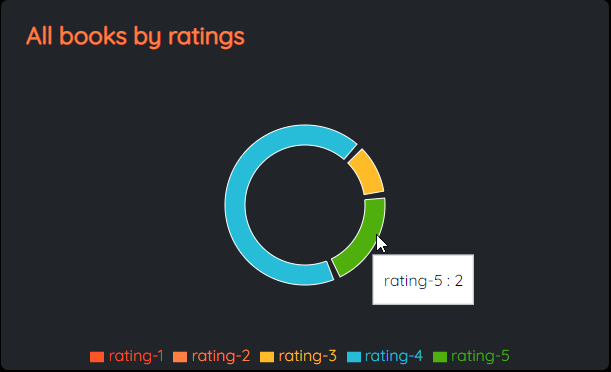 Figure 5.3: Pie chart to group books by rating
Visualize Top N books using Funnel chart
Let's visualize the top 5 books by views and rating. To do that, we will use a funnel chart from the recharts library. We will also have a toggle button to toggle the chart for page views and ratings of a book.
So, create a file with FunnelByTopN.js under src/charts with the following content.
import React, { useState, useEffect } from "react";

import {
  FunnelChart,
  Funnel,
  LabelList,
  Tooltip,
  ResponsiveContainer,
} from "recharts";

import Heading from "../Heading";

const FunnelByTopN = () => {
  const [data, setData] = useState([]);
  const [metric, setMetric] = useState('rating');
  const [isLoading, setIsLoading] = useState(true);
  const API_URL = "<Your_Custom_Function_Url>/library/books";

  // Method to get a color based on a rating or view range
  const getColor = value => {
        if (metric === 'rating') {
            if (value >= 1 && value < 2) {
                return "#ff5328";
            } else if (value >= 2 && value < 3) {
                return "#FF8042";
            } else if (value >= 3 && value < 4) {
                return "#FFBB28";
            } else if (value >= 4 && value < 5) {
                return "#28dfffcf";
            } else if (value === 5) {
                return  "#4eaf0d";
            }
        } else if (metric === 'views') {
            if (value >= 0 && value < 100) {
                return "#ff5328";
            } else if (value >= 100 && value < 200) {
                return "#FF8042";
            } else if (value >= 200 && value < 500) {
                return "#FFBB28";
            } else if (value >= 500 && value < 1000) {
                return "#28dfffcf";
            } else if (value >= 1000) {
                return  "#4eaf0d";
            }
        }
  }

  // Transform the data as needed by the chart input
  // Sort it by either the selected metric
  // Take out the Top 5 values(books)
  const transform = (data) => {
        const transformed = data.map(book => {
            return {'name': book.title, 'value': book[metric], 'fill': getColor(book[metric])}
        });
        // sort by value
        transformed.sort((a, b) => {
            return b.value - a.value;
        });
        // return top 5
        return transformed.slice(0, 5);
  }

  useEffect(() => {
    fetch(API_URL)
      .then((res) => res.json())
      .then((data) => {
                const transformed = transform(data);
                console.log(transformed);
        setData(transformed);
        setIsLoading(false);
      });
  }, [metric]);

  // Handles the toggle button action
  const toggleMetric = () => {
        if (metric === 'rating') {
            setMetric('views');
        } else {
            setMetric('rating');
        }
    }

  return (
    <div>
        <div style={{display: 'flex', flexDirection: 'row', justifyContent: 'flex-start', alignItems: 'baseline'}}>
            <Heading text={`Top 5 books`}/>
            <button
                className="topNToggleBtn"
                style ={{marginLeft: '0.5rem'}}
                onClick={toggleMetric}>{metric === 'rating' ? 'by Rating' : 'by Views'}
            </button>
        </div>
        {
            isLoading ? (
                <div>Loading...</div>
            ) : (
                <ResponsiveContainer width="100%" height={300}>
                <FunnelChart>
                    <Tooltip />
                    <Funnel dataKey="value" data={data} isAnimationActive>
                    <LabelList
                        position="insideTop"
                        fill="#000"
                        stroke="none"
                        dataKey="name"
                    />
                    </Funnel>
                </FunnelChart>
                </ResponsiveContainer>
            )
        }
    </div>
  );
};

export default FunnelByTopN;
Here is how the Funnel chart will look like with the data.
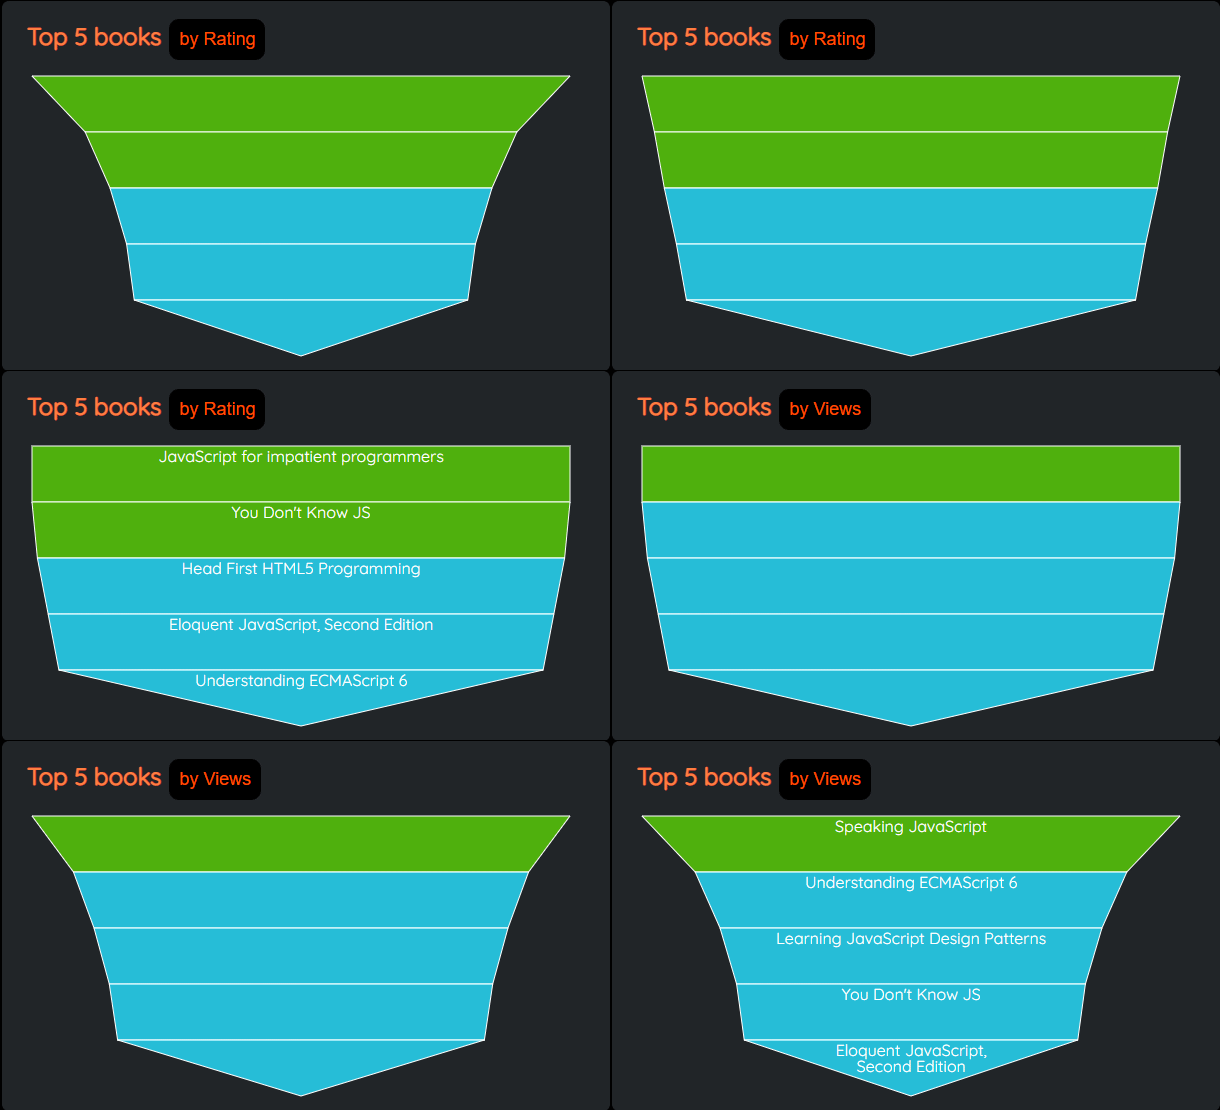 Figure 5.4: Funnel chart to show Top-N books
Combine all the charts into a Dashboard
So, you can create as many charts as you may want with the data. Finally, you can combine all the charts into the App.js file to create a dashboard.
import './App.css';

import BarByTopics from './charts/BarByTopics';
import PieByRatings from './charts/PieByRatings';
import LineByPagesViews from './charts/LineByPagesViews'
import FunnelByTopN from './charts/FunnelByTopN';

function App() {
  return (
    <div className="wrapper">
      <div className="box1 box"><FunnelByTopN /></div>
      <div className="box2 box"><BarByTopics /></div>
      <div className="box3 box"><PieByRatings /></div>
      <div className="box4 box"><LineByPagesViews /></div>
    </div>
  );
}

export default App;
It's time to add some CSS to style the Dashboard. Please add the following styles to the App.css file.
.wrapper {
  display: grid;
  grid-template-columns: repeat(3, 1fr);
}

.wrapper .box {
  margin: 5px;
  background-color: #212529;
  margin: 1rem;
  border-radius: 7px;
}

.box1 {
  grid-column-start: 1;
  grid-row-start: 1;
  grid-row-end: 3;
}

.box2 {
  grid-column-start: 2;
  grid-row-start: 1;
  grid-row-end: 3;
}

.box3 {
  grid-column-start: 3;
  grid-row-start: 1;
  grid-row-end: 3;
}

.box4 {
  grid-column-start: 1;
  grid-column-end: 4;
  grid-row-start: 5;
  grid-row-end: 8;
}

.topNToggleBtn {
  margin-left: 0.5rem;
  color: #ff5200;
  background: #000;
  border: none;
  border-radius: 10px;
  padding: 10px;
  font-size: 18px;
  cursor: pointer;
}
That's all. Now we have a fully interactive, stylish dashboard ready with all the charts.
 Figure 5.5: The final dashboard.
In case you get stuck in running the application, here is the link to the GitHub repository to refer to.
Please give a ⭐, if you liked the work. It motivates me.
What's Next?
HarperDB custom functions are a fantastic inclusion to the stack. As you learned, you can create data store, APIs from the same place without worrying about deployment, managing them. It provides great freedom to developers to focus on doing what they do best, implementing the use-cases.
Did you know you can also host a static UI using custom functions? Yes, that's possible too. Please check this out to learn more.
Before we end, let me leave you with a few more articles about HarperDB and custom functions to explore further,
- Build an App Using HarperDB's New Custom Functions 🚀 by Margo McCabe
- How I used HarperDB Custom Functions to build a web app for my newsletter by Hrithwik Bharadwaj
- Curate Top Programming Blogs with React and HarperDB by Victoria Lo
- Build a REST API with HarperDB and FastifyJS by Catalin Pit
I hope you found the article insightful and informative. Please like/share so that it reaches others as well.
Let's connect. I share my learnings on JavaScript, Web Development, and Blogging on these platforms as well,